roto's sword
July 2009
Dragon Quest is a video game where a hero character is charged with saving the Kingdom of Alefgard and rescuing its princess from the evil Dragonlord.
Dragon Quest is a video game where a hero character is charged with saving the Kingdom of Alefgard and rescuing its princess from the evil Dragonlord.
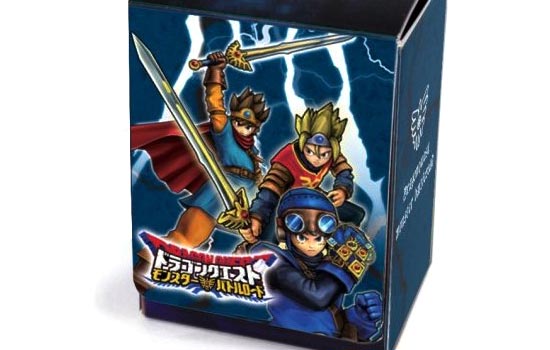
I was commissioned to make a replica of the Roto’s sword and scabbard from the game Dragon Quest.
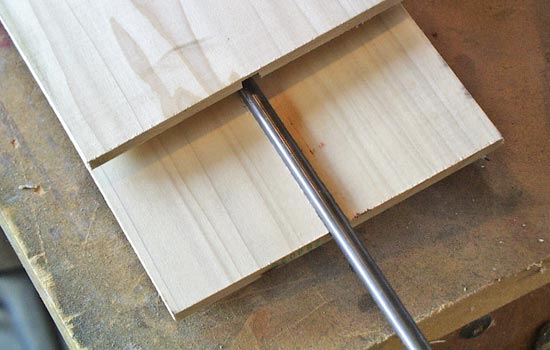
For the blade, I glued together two sheets 1/4″ Poplar with a channel cut to contain a 5/16″ steel rod.
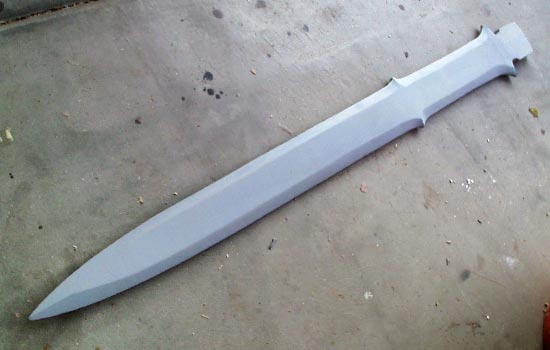
After cutting the profile, I shaped the blade edges on the belt sander.
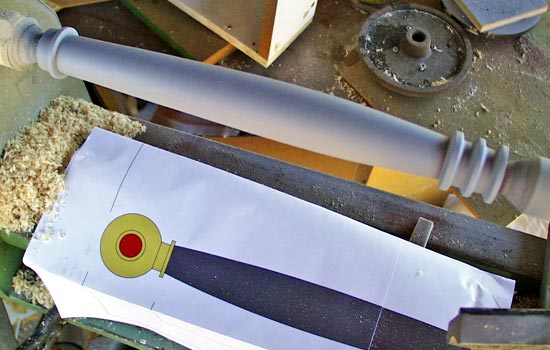
The grip was shaped on a lathe from basswood.
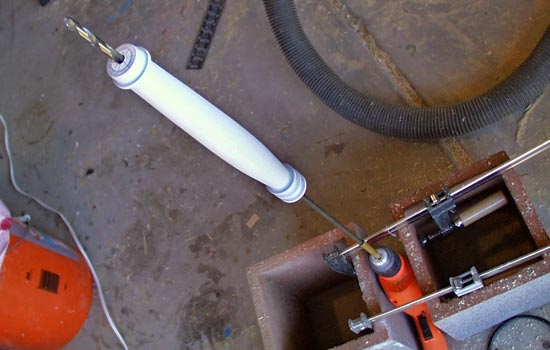
I used a long bit to core out the center to house the steel rod.
A test fit of handle on blade.
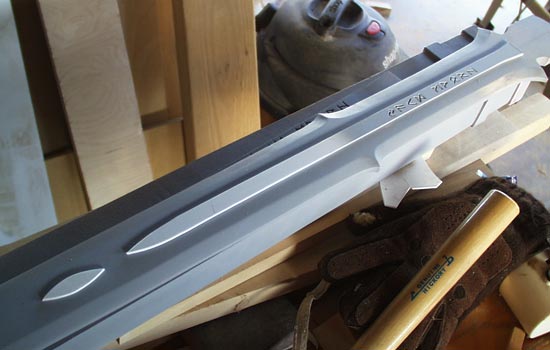
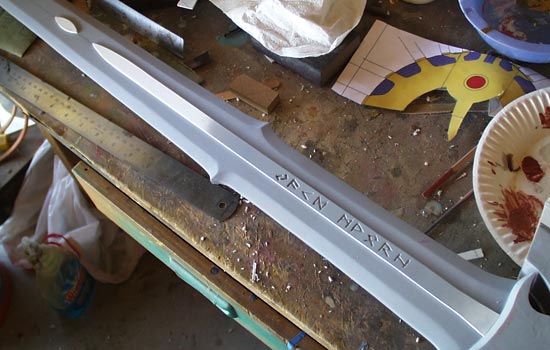
The center rune strips were cut from thick styrene. I found Norse runes that closely matched the reference and carved them into the plastic.
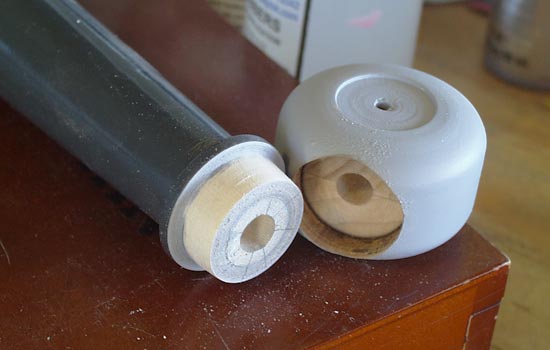
For the pommel, I lathed a yoyo shape from basswood and then drilled out the base.
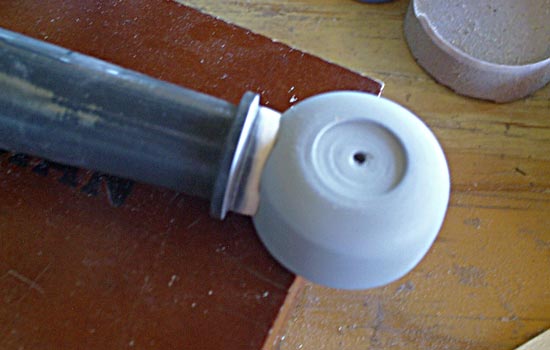
The pommel now fits perfectly on the handle.

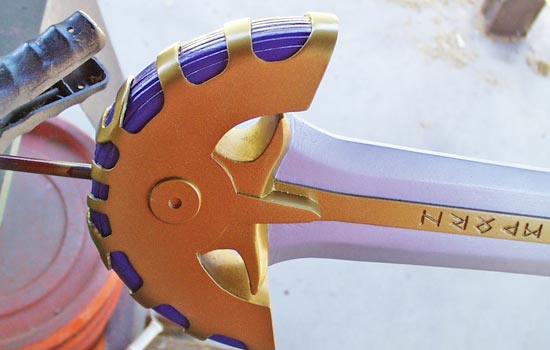
I glued three pieces of MDF to form the guard, leaving a channel for the blade. It was rounded on the router table.
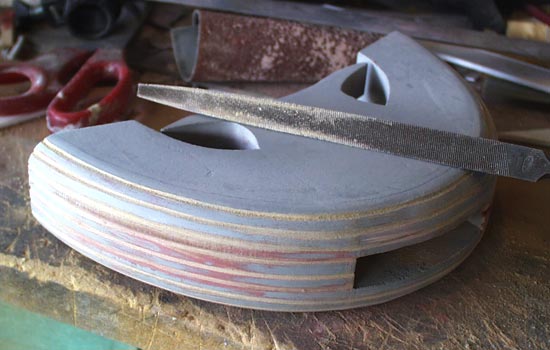
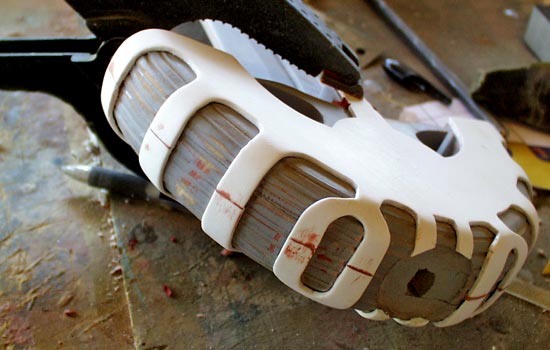
I used a series of files to carve grooves into the curve of the guard.
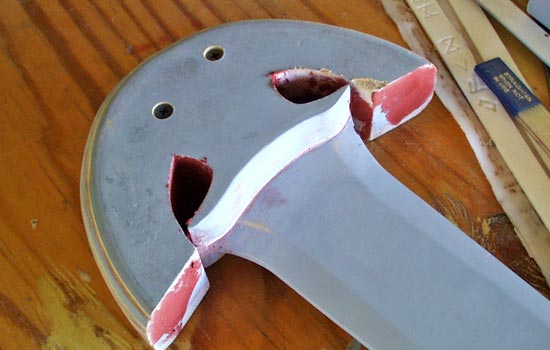
I glued the guard on to the blade and puttied up the seams. I also inserted screws to give the guard extra strength.
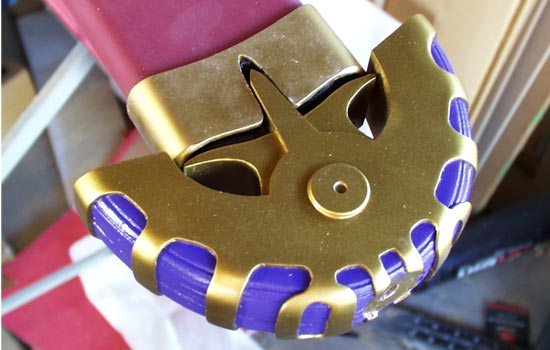
The “bird” shapes for the guard were cut from thick styrene.
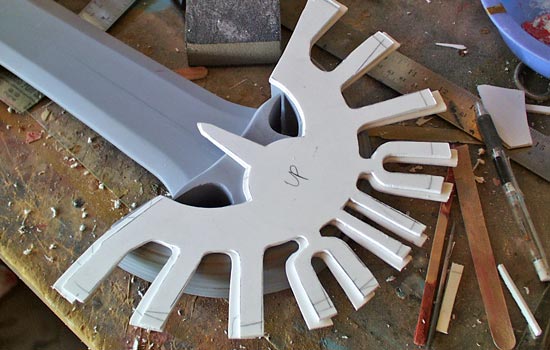
I glued on the center rune strips.
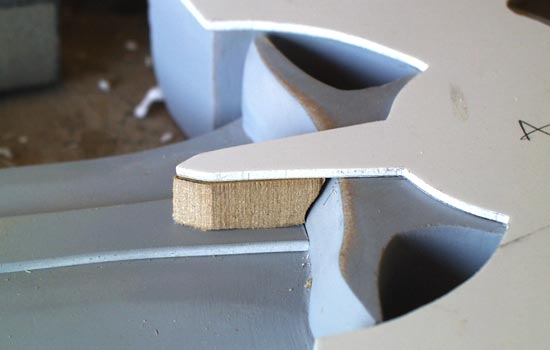
To bridge the distance from the rune strip to the bird, I cut some MDF spacers.
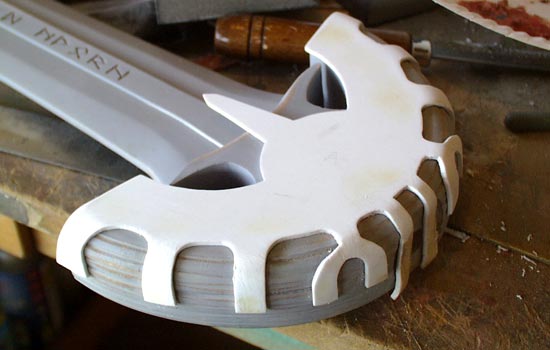
Once the styrene was glued down, I used a heat gun to form the “feathers” around the curve.
Once both sides were shaped, I puttied up the seam.

A quick coat of primer to see progress.
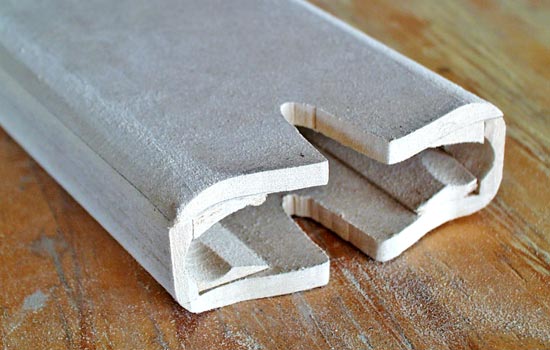
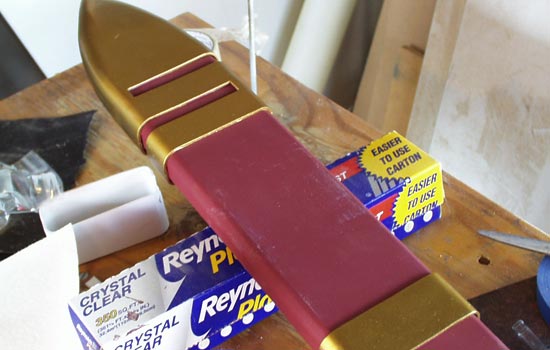
I made a scabbard box from 1/4″ MDf and reinforced it with MDF in the inside corners.

I found some nice thick leather to wrap around the scabbard.
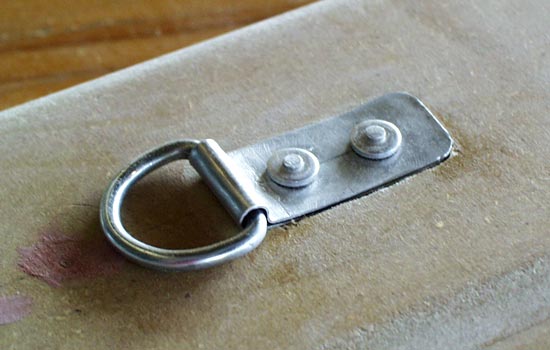
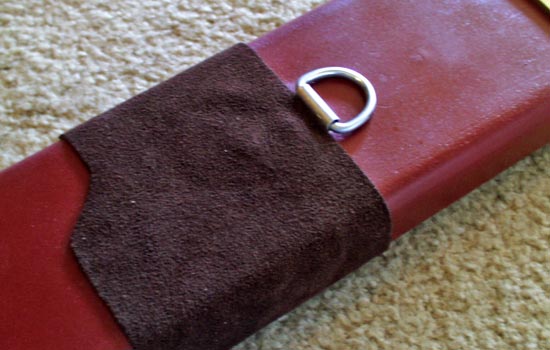
The scabbard is to be carried across the back so I got a D-ring as an attachment.
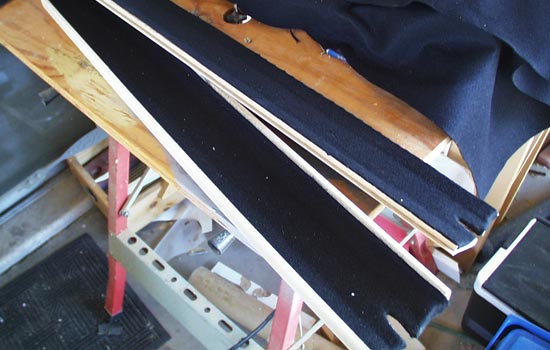
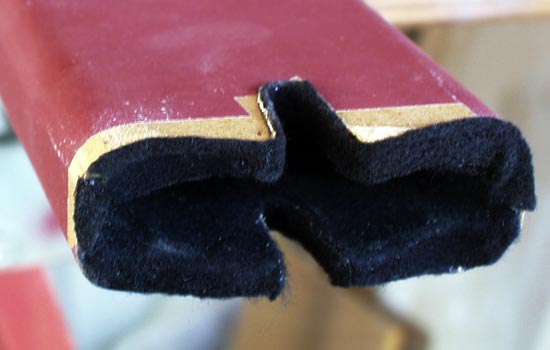
I glued black felt into the inside of the scabbard to protect the blade.
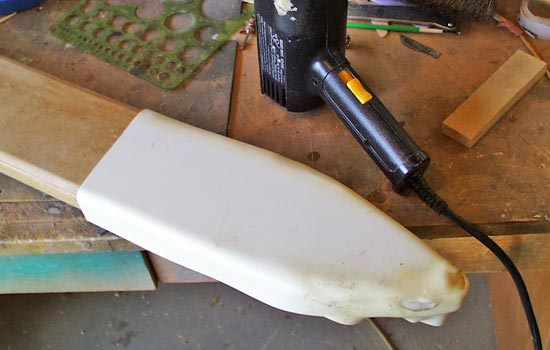
I heat formed thick styrene plastic over the tip to form the end cap.
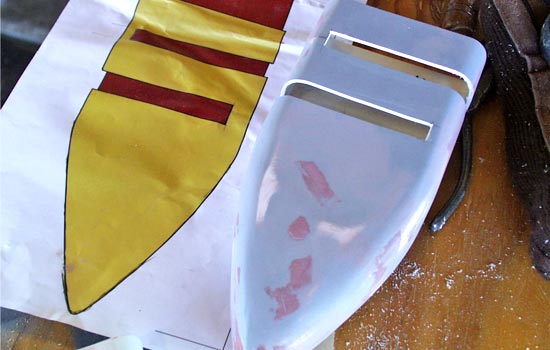
Once the imperfections were smoothed out, I cut the decorative slots with a band saw.
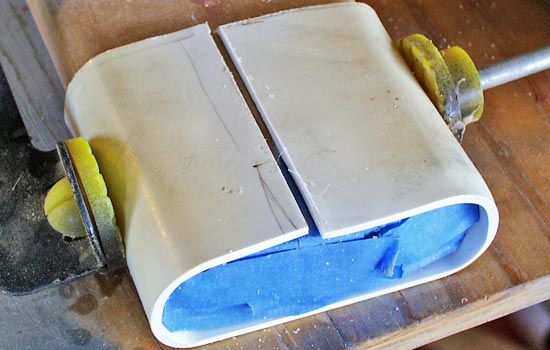
For the scabbard collar, I heat formed more plastic around the opening. The blue tape is protecting the felt interior from dust.
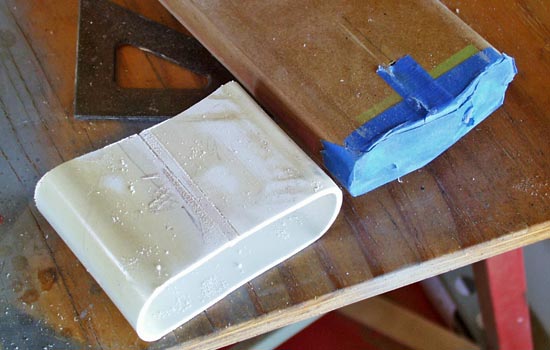
I sealed the seam and cut the curved base.
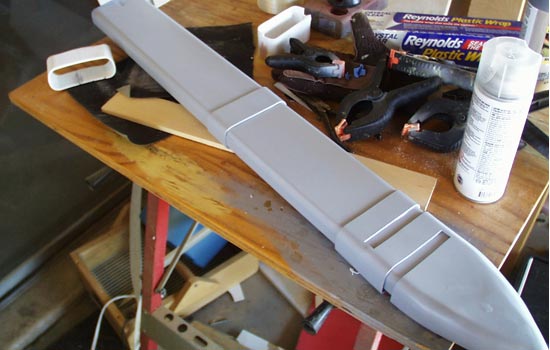
I glued the cap and center band (also heat formed plastic like collar) and gave it all a pretty coat of primer.
I painted the blade and top coated it with Future to protect the finish.
The scabbard and all the “hardware” was also painted. The red applied smoothly…any imperfections you see are from my dusty fingers. It wiped off before top coating.
I applied some extra felt on the top edge to protect the guard when it’s put in the scabbard.
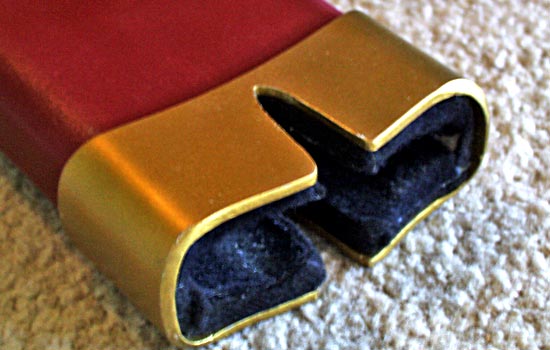
Once the collar was glued on, I cut the slot for the guard for a proper fit.
A test fit showing the sword inserted.
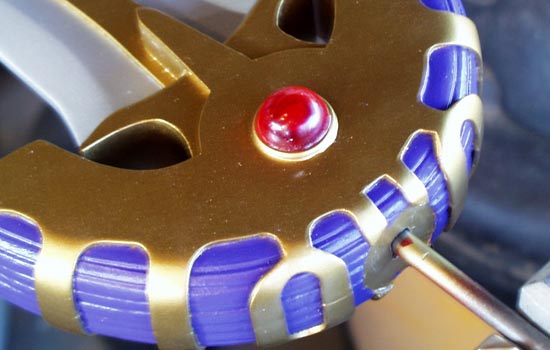
I cast some resin gems and glued them to both sides of the guard.
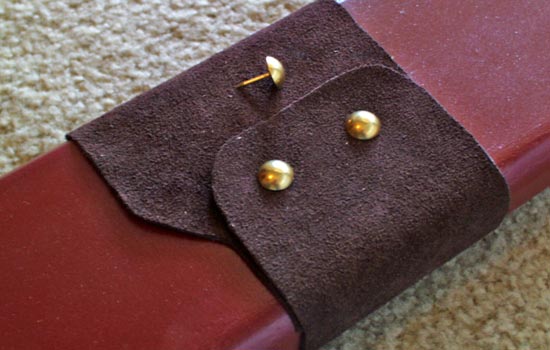
I glued the leather to the scabbard and used upholstery tacks to simulate rivets. I trimmed the nail so that it only went 1/8″ into the scabbard surface.
The back of the wrap covers the ugly rivets!
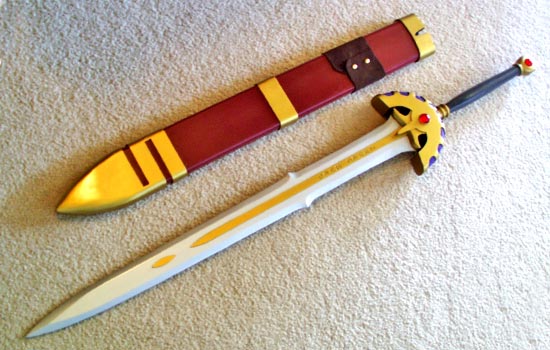
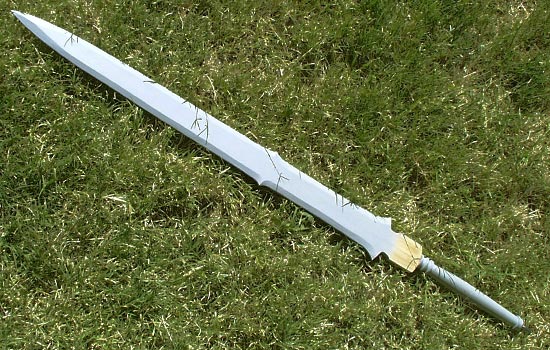
The final sword!
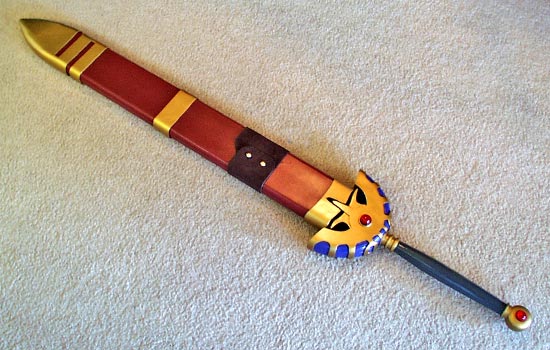
Sword in scabbard.
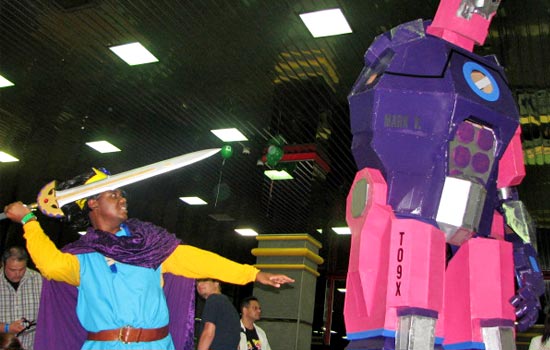
The sword in the hands of the client, battling robots!