BPRD PISTOL
november 2012
The Bureau for Paranormal Research and Defense (BPRD) is a fictional organization in the comic book work of Mike Mignola,charged with researching the supernatural, and defending against its dangers.


The Bureau for Paranormal Research and Defense (BPRD) is a fictional organization in the comic book work of Mike Mignola,charged with researching the supernatural, and defending against its dangers.
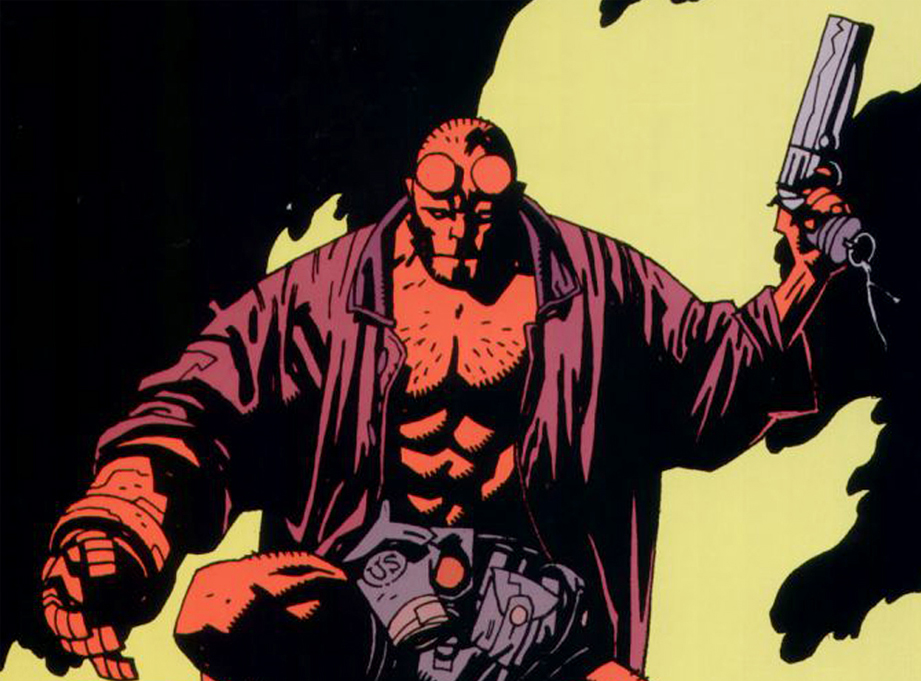
I was commissioned to make a replica of Hellboy’s gun from Mike Mignola’s comics. Mike’s style is very simple so there wasn’t a lot of detail to base the plans on.
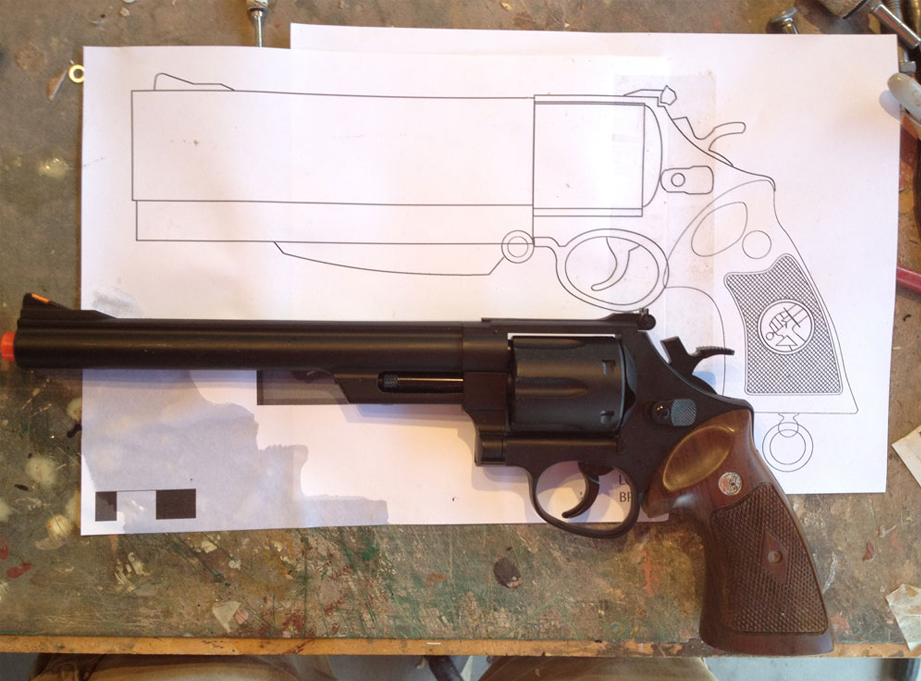
The client had attempted to make one himself so had already bought supplies and an airsoft gun. I based my plans on this gun so that I could make parts that fit the same model for a kit.
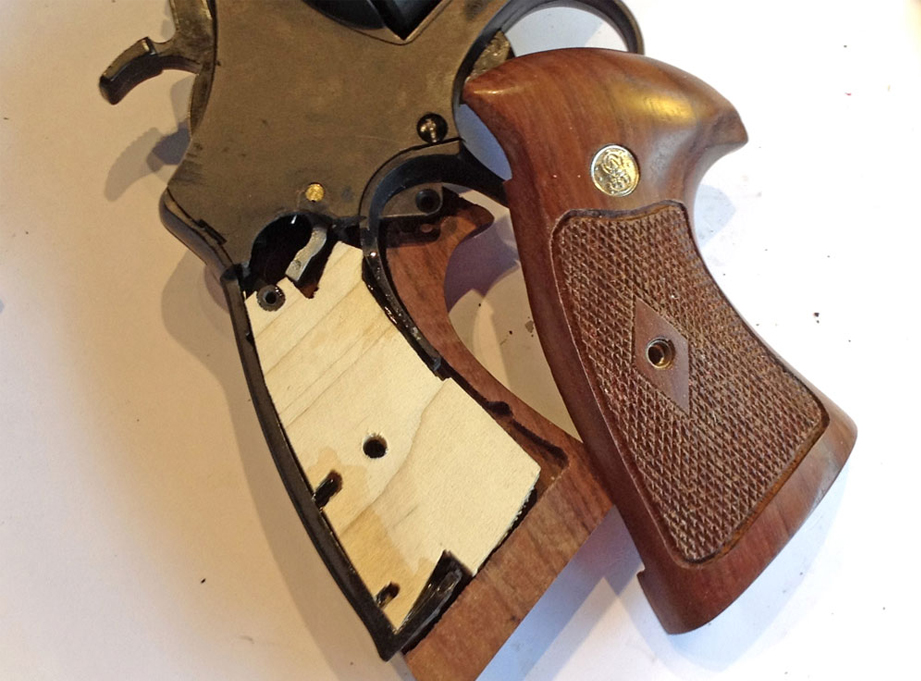
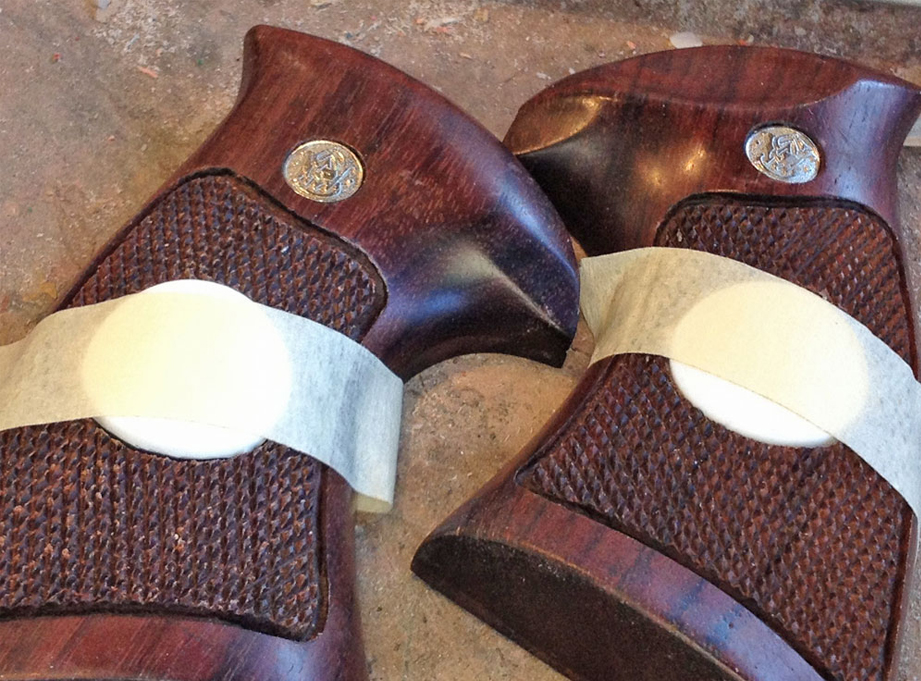
The client had also purchased real wood grips for the prop. He had already removed the gas chamber from the gun so I had to reinforce the grip frame with a block of poplar.
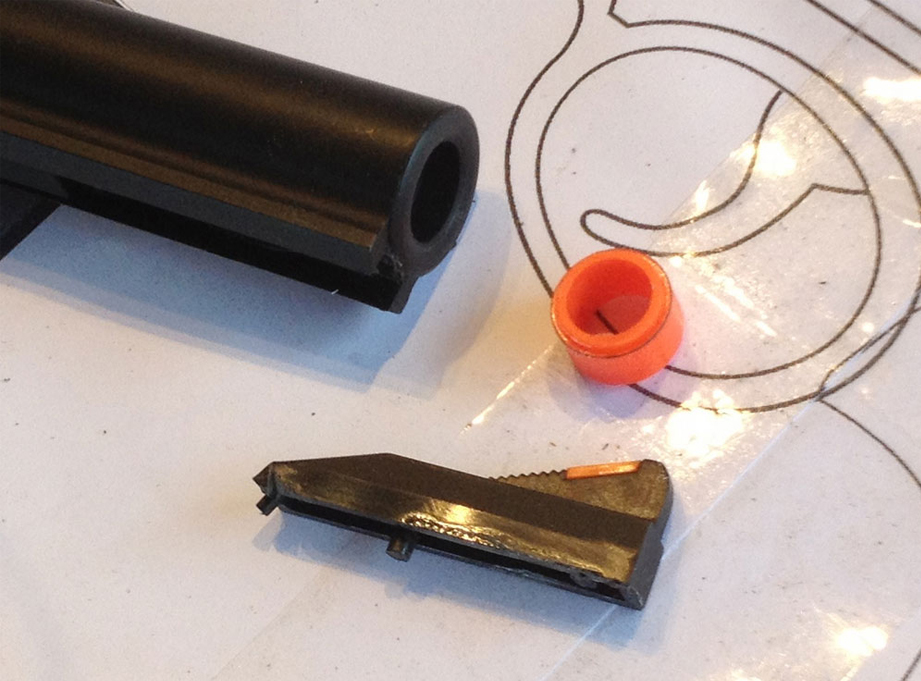
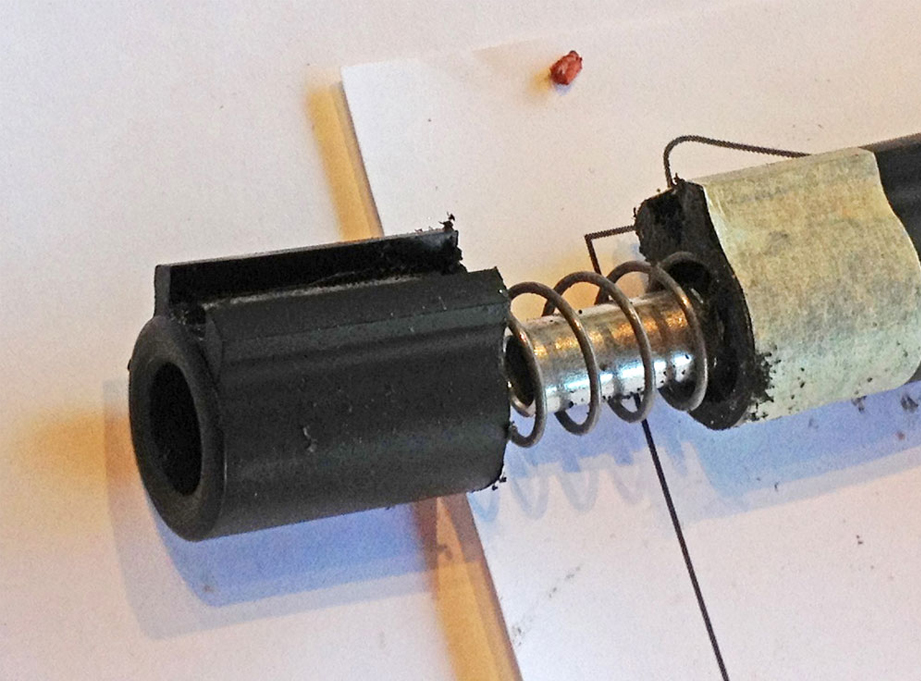
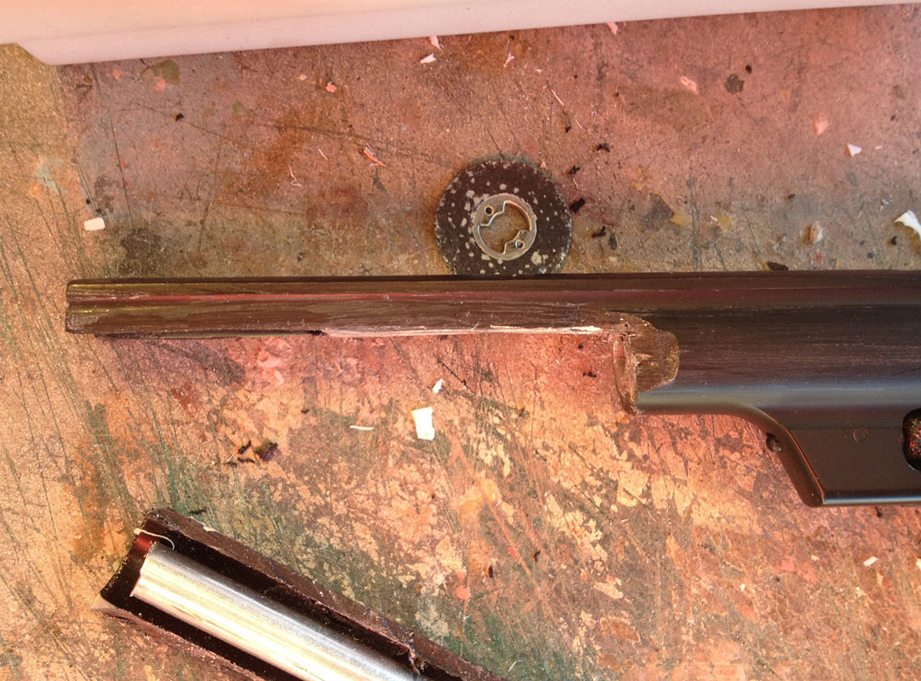
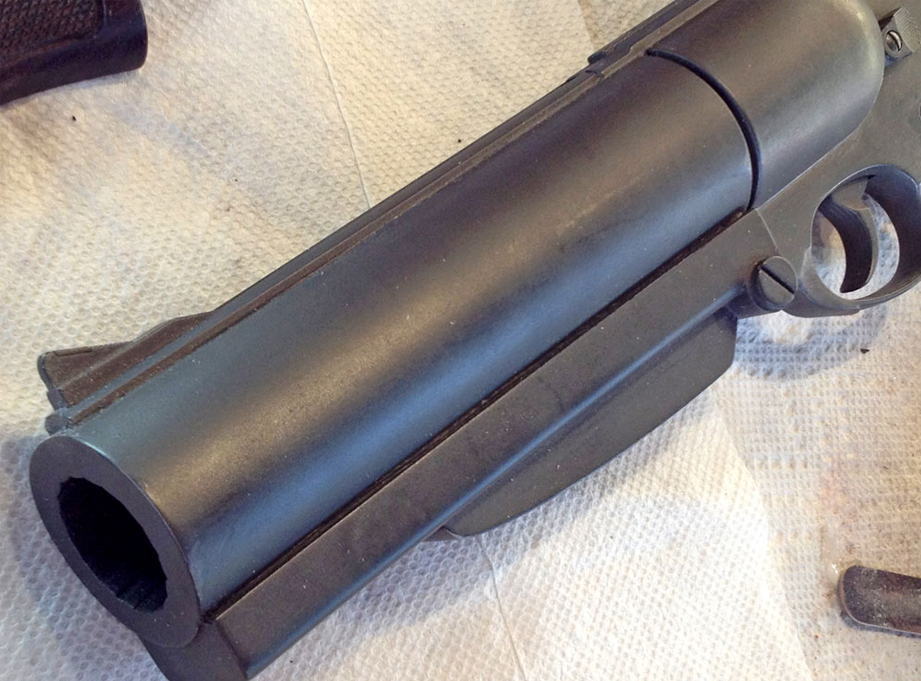
The barrel on the donor gun was too long so the first order of business was to modify it to fit the plans. I removed the orange tip and popped off the front sight for later use.
I used the Dremel cutting wheel to remove about an inch off the end of the barrel and removed a spring (not sure what that was doing in there…).
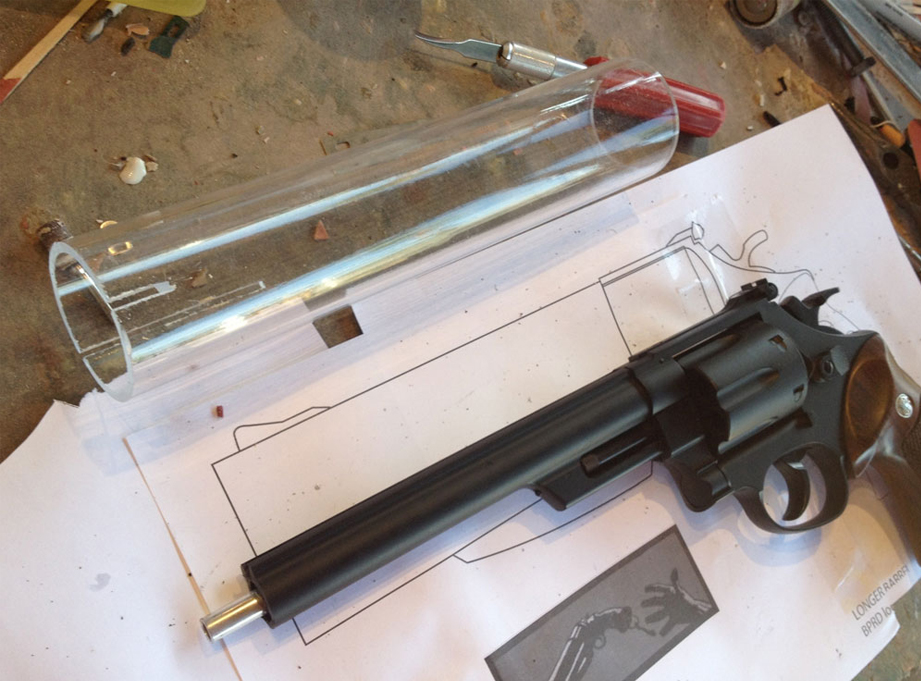
The new barrel would be formed by an acrylic tube. I would’ve like to keep the airsoft functional but the new barrel wasn’t going to line up with the old one.
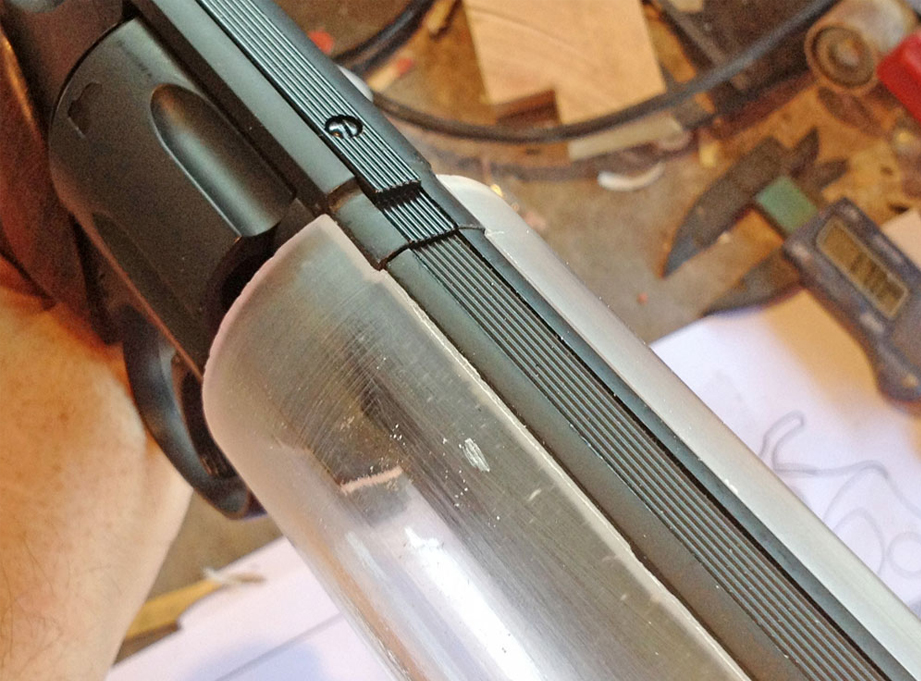
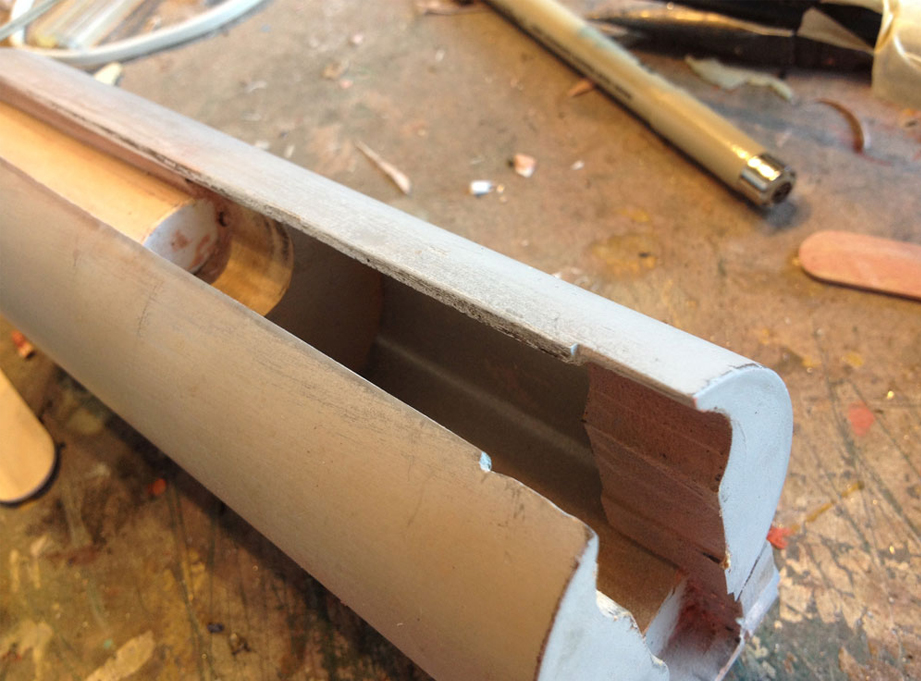
I marked the location for the sight rail on the tube and scored the cutting path with a blade. I used a board as a straight edge to keep the path parallel to the length of the tube.
Using a cutting wheel, I removed the a slot. The edge had to be cleaned up with files.
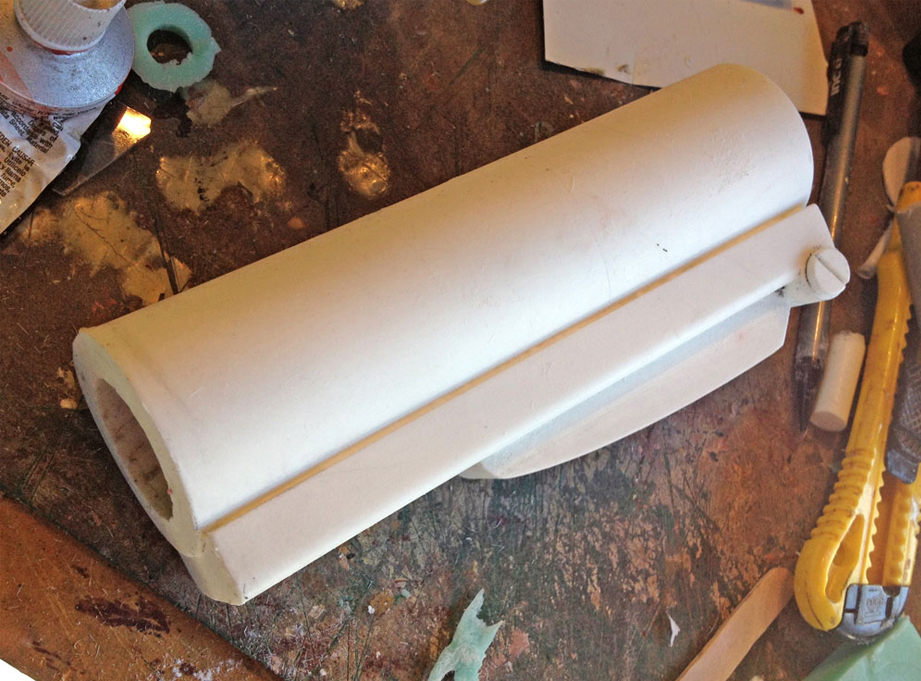
The tube in place. The sight rail was too cool not to use.
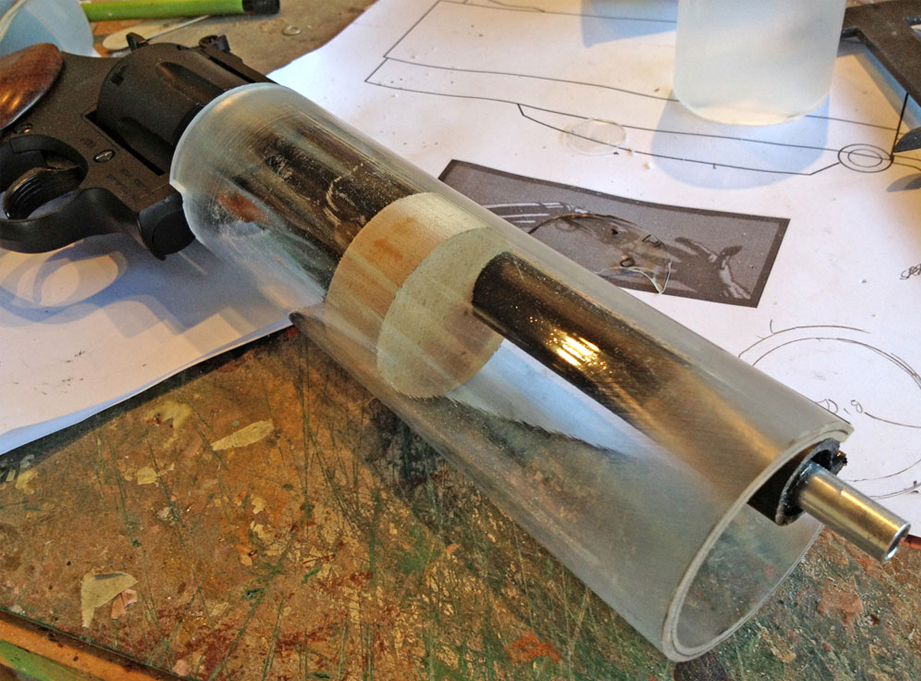
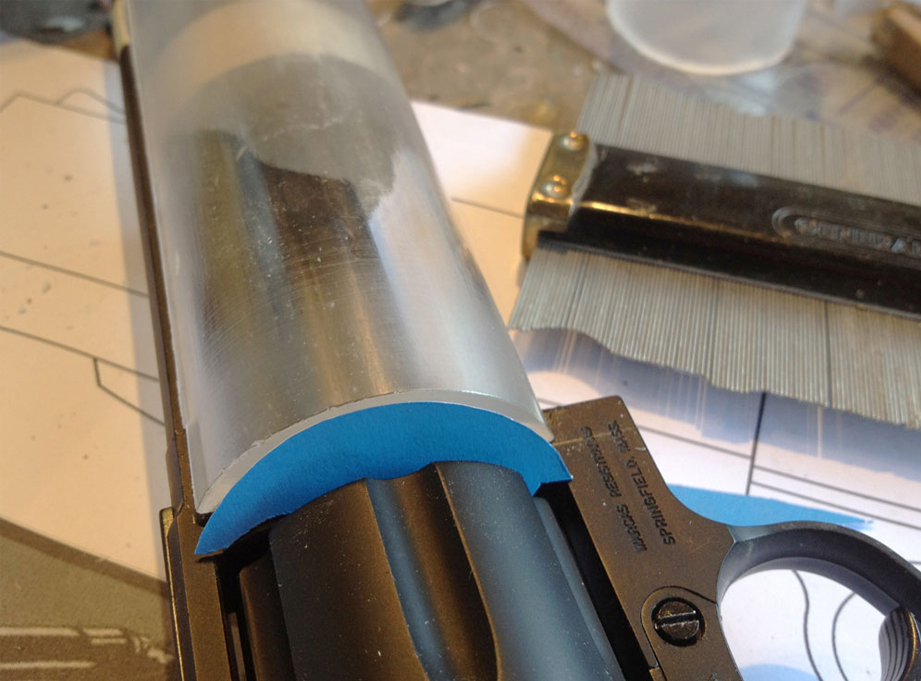
To keep the gun properly aligned in the tube, I made some MDF spacers.
To make the end of the tube flush around the curves of the gun’s frame, I used a contour gauge to transfer the profile to poster board. This was then used to trace the shape onto a piece of MDF.
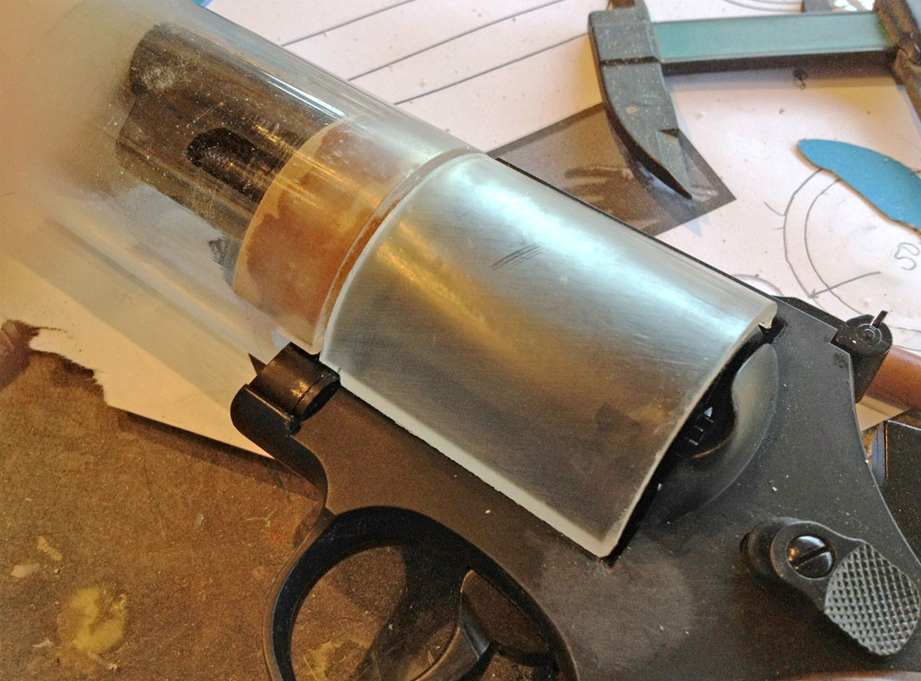
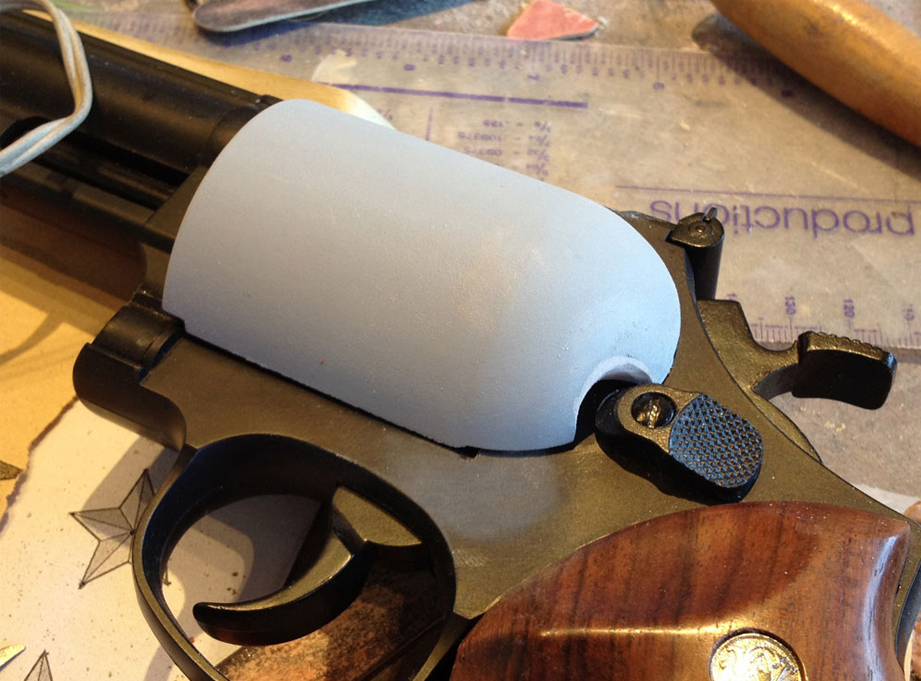
The remainder of the tube was used to make the cylinder covers.
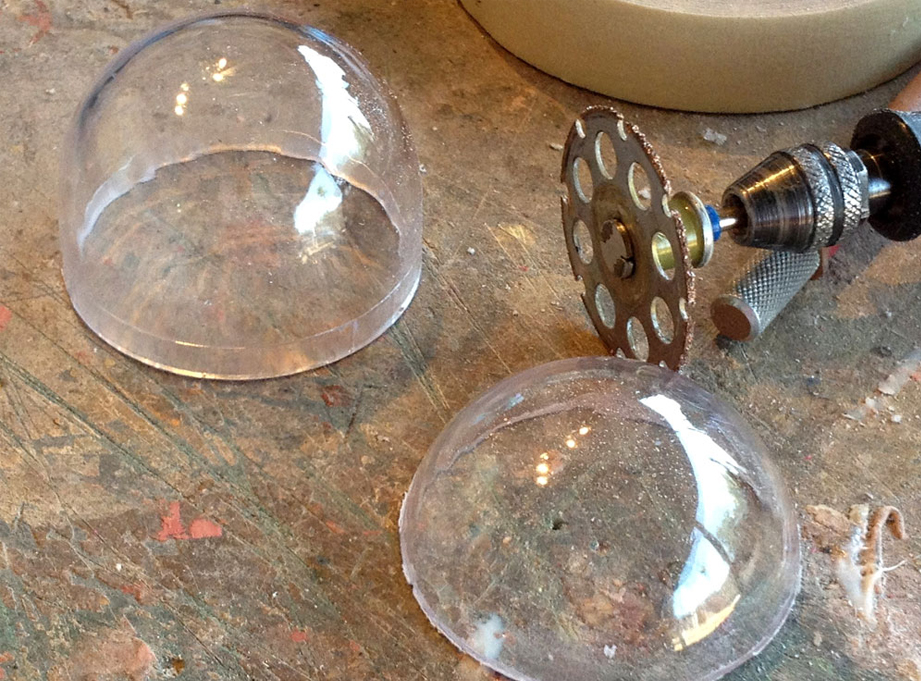
The client also supplied acrylic domes which I cut to fit the tube edge.
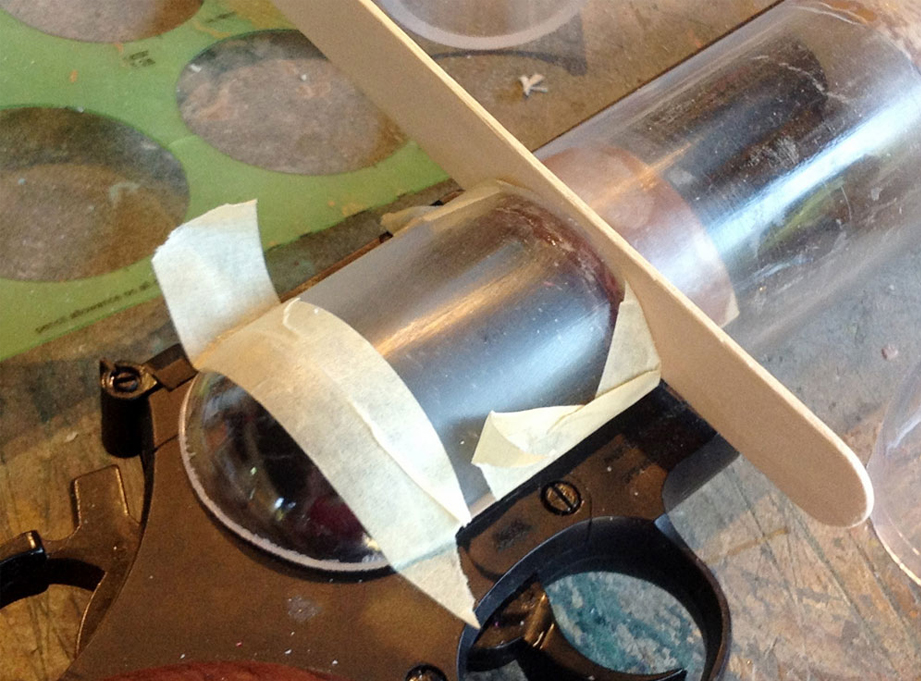
I taped the pieces together and epoxied them from the inside. The wood stick makes sure the spacing is right.
Putty and sanding removed the seam.
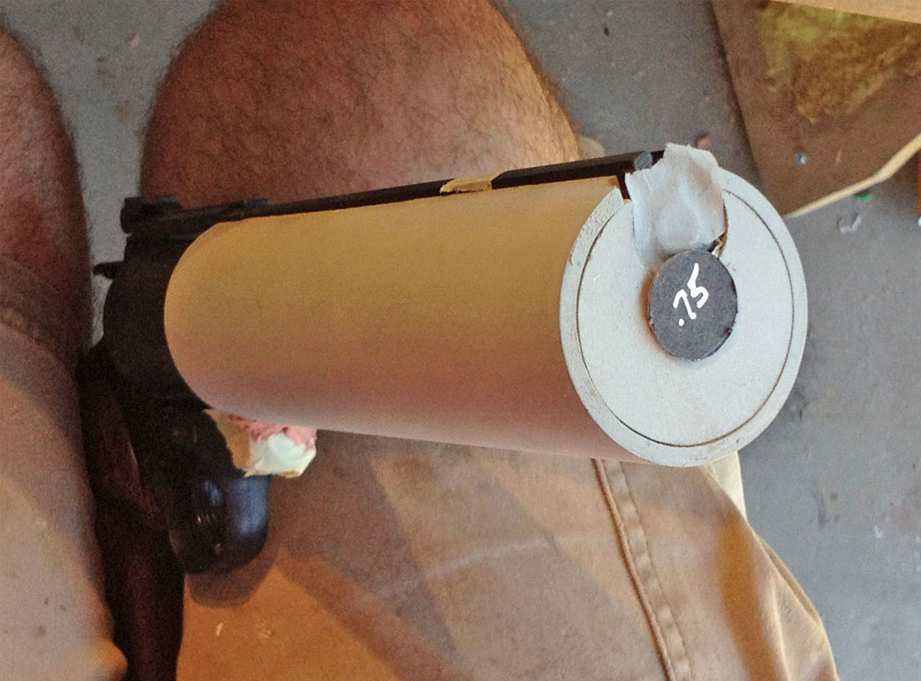
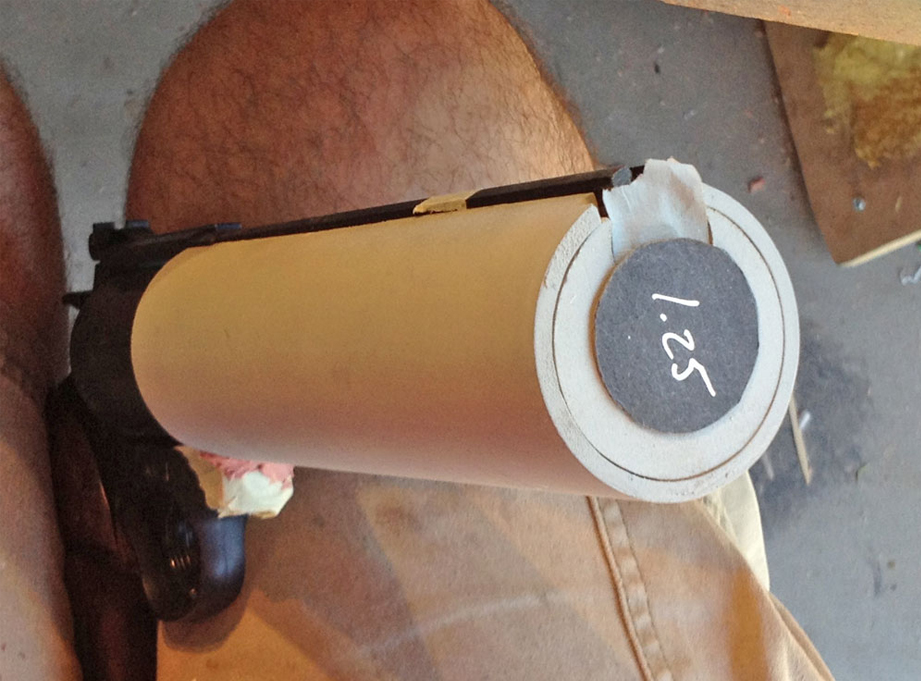
To figure out how big the barrel should be (and by extens the bullet that it shoots), I cut black poster board to show the client.
The .75 caliber made the barrel look like a silencer and it wasn’t until you got to 1.25 that the thickness of the metal looked appropriate as a gun barrel. This thing would fire one big, monsta-killin’ bullet!
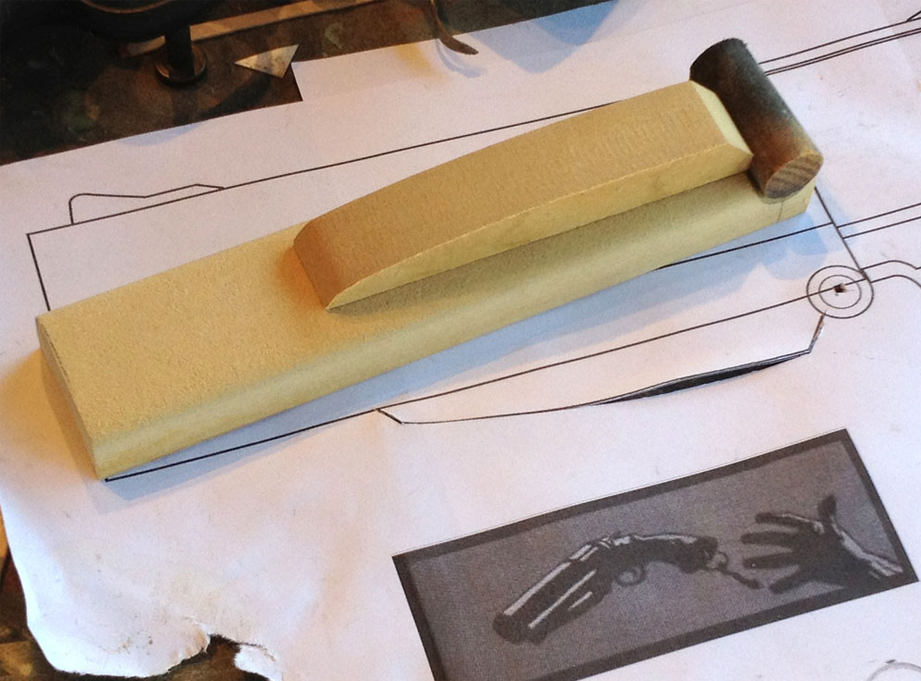
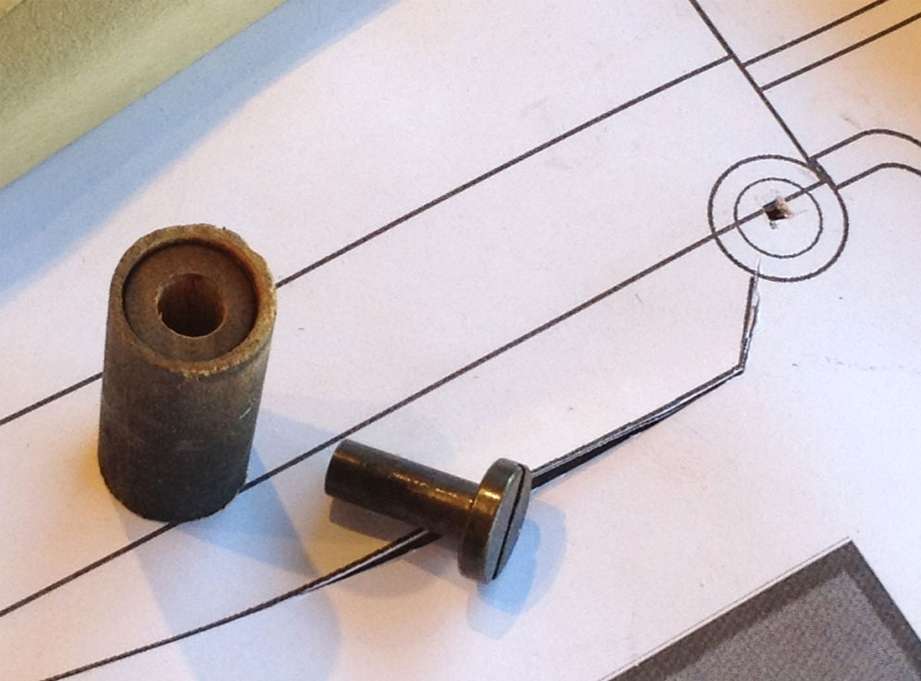
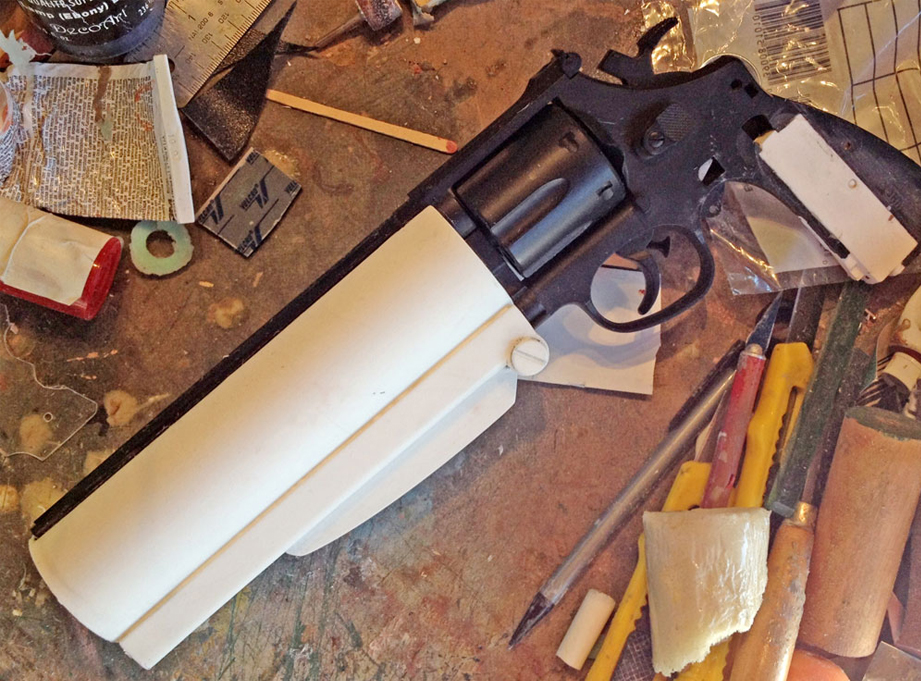
For the supporting pieces under the barrel, I cut MDF and a wooden dowel for the (non-functional) hinge.
I drilled out the ends of the dowels and glued in the binding screws that the client sent.
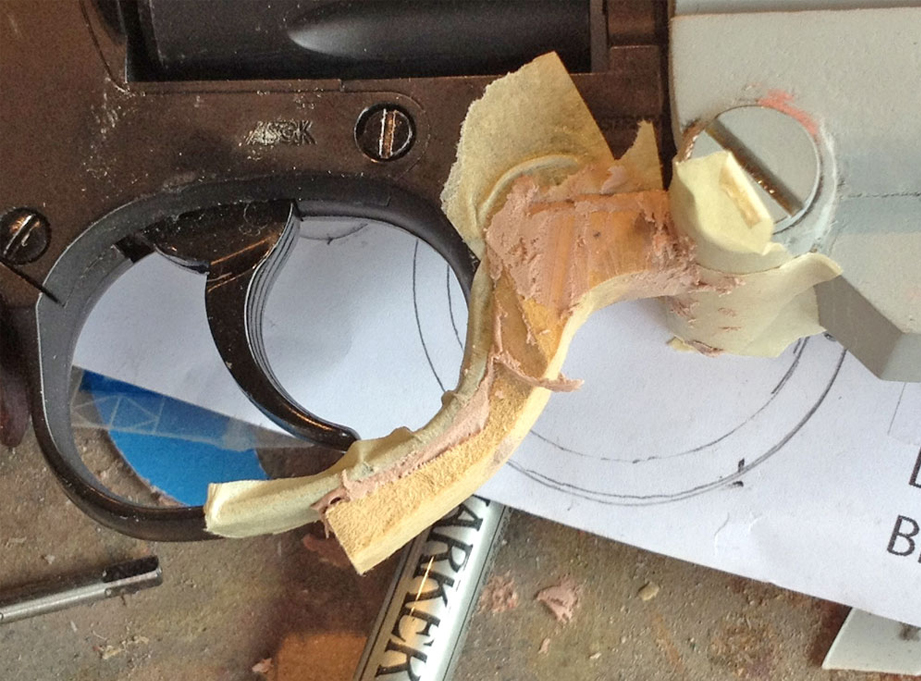
With all the big pieces added to the airsoft gun, The trigger guard was looking a little frail. I cut some MDF and used Bondo to make a snug fit.
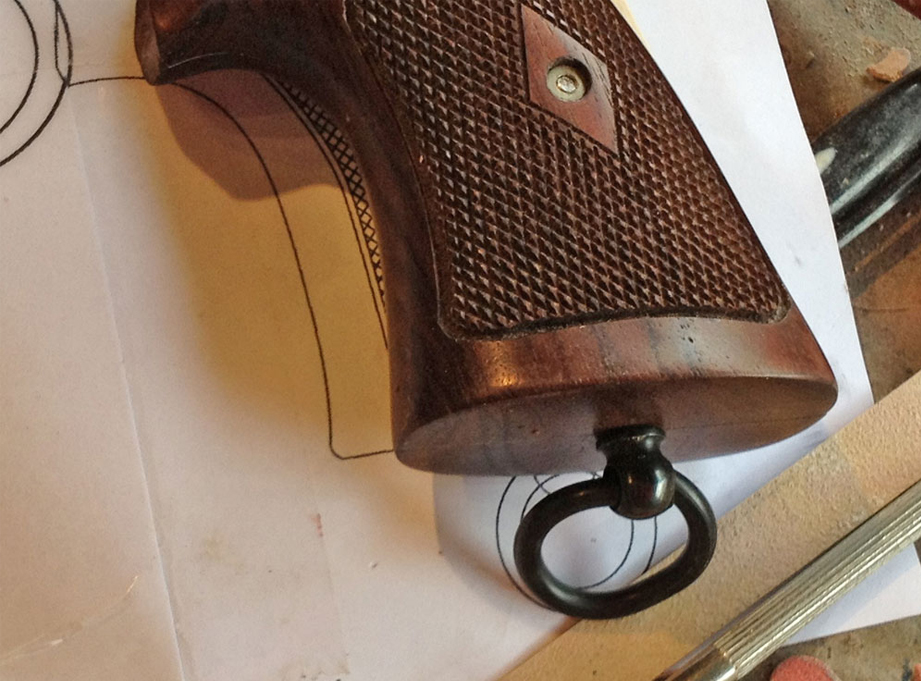
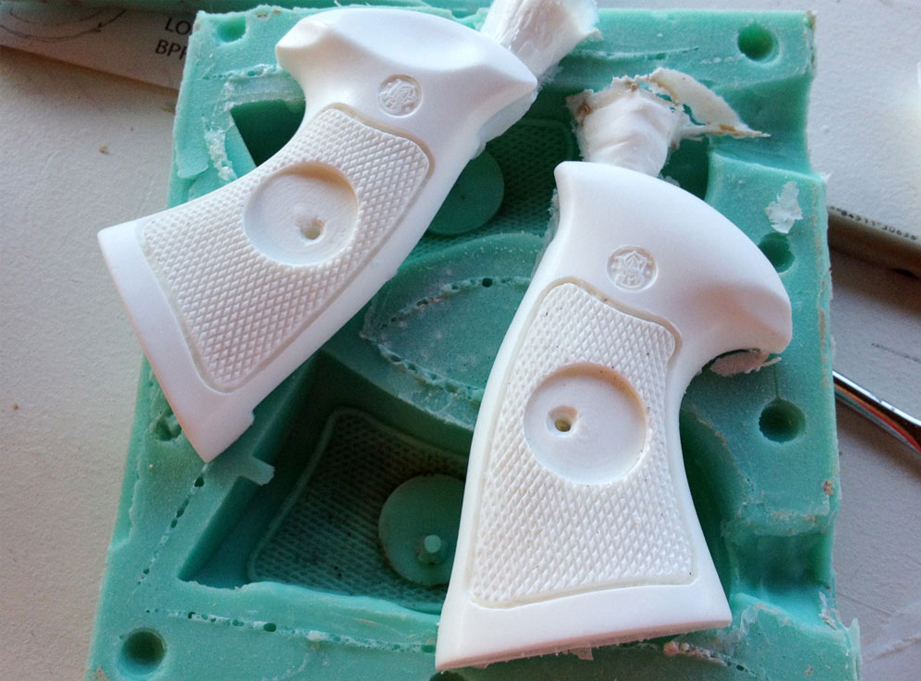
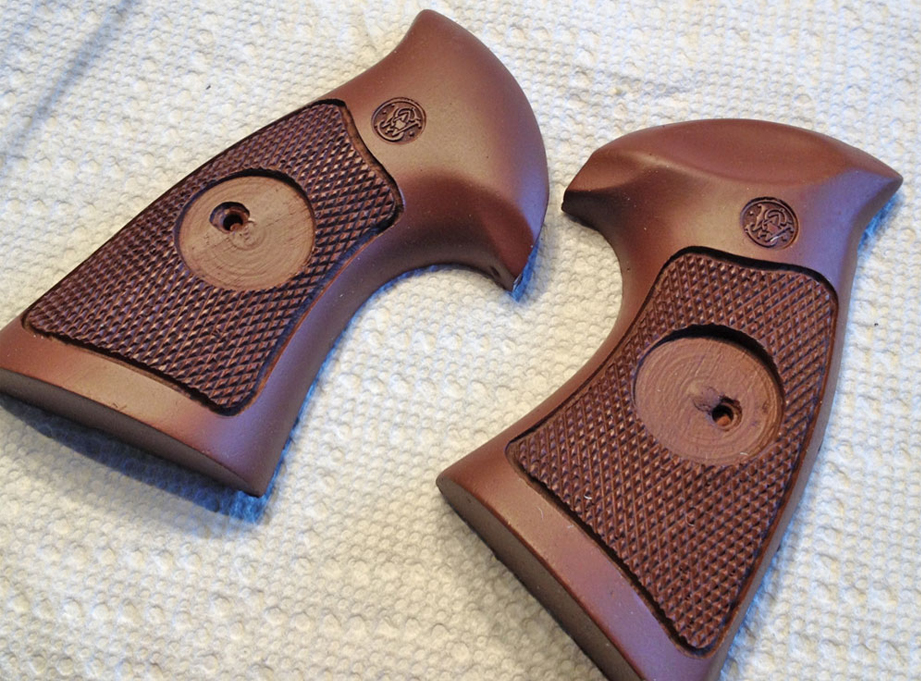
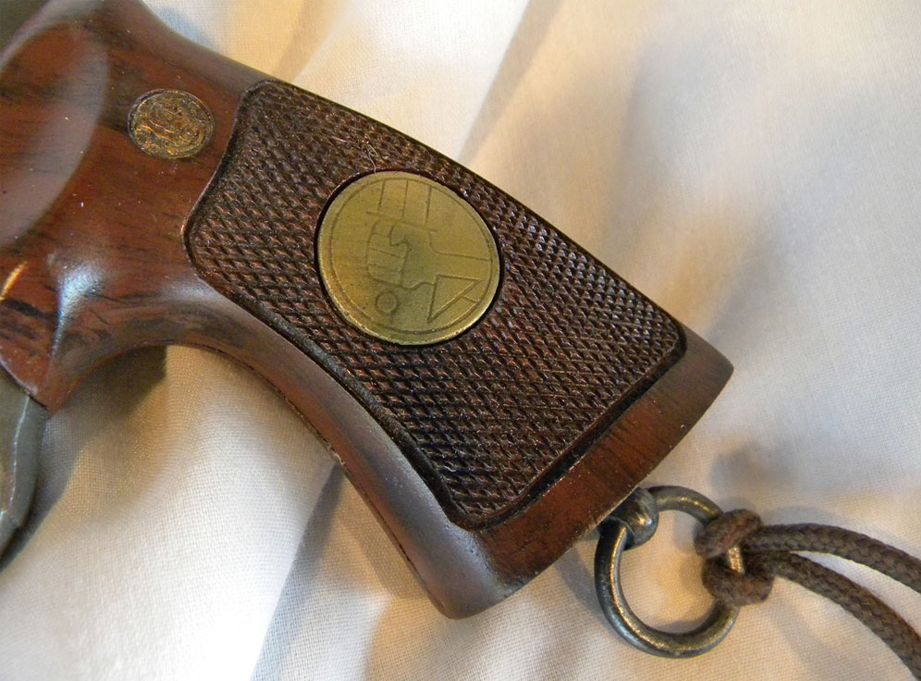
In prepping the grips for the prop, I had to carefully drill holes into the these expensive wood pieces. A hole was drilled under the grip for the lanyard ring.
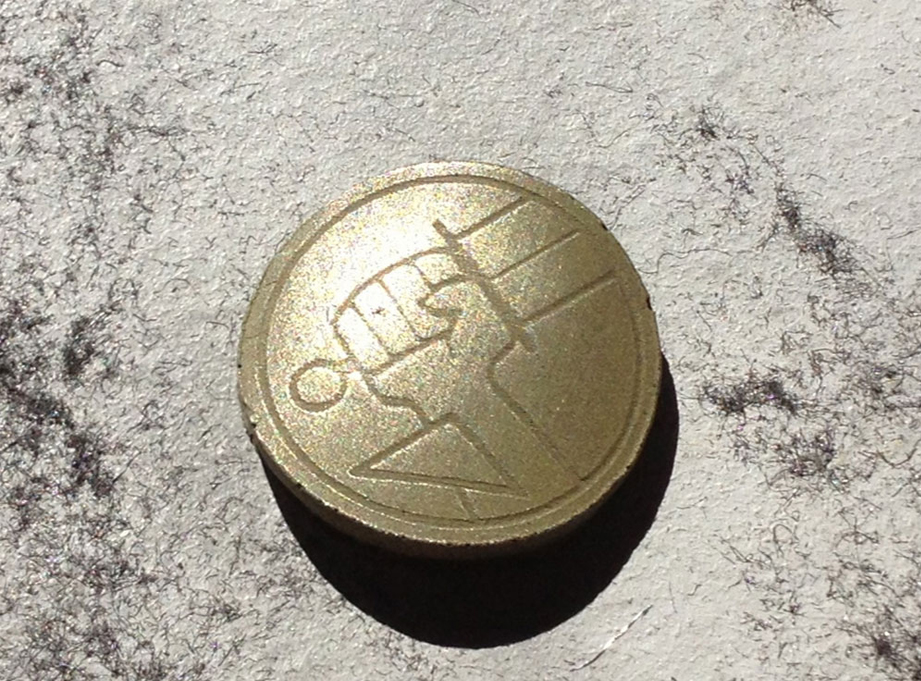
It killed me to do it, but I used a forstner bit to cut a hole for the B.P.R.D. seal. Fortunately, it cut cleanly without beating up the diamond pattern.
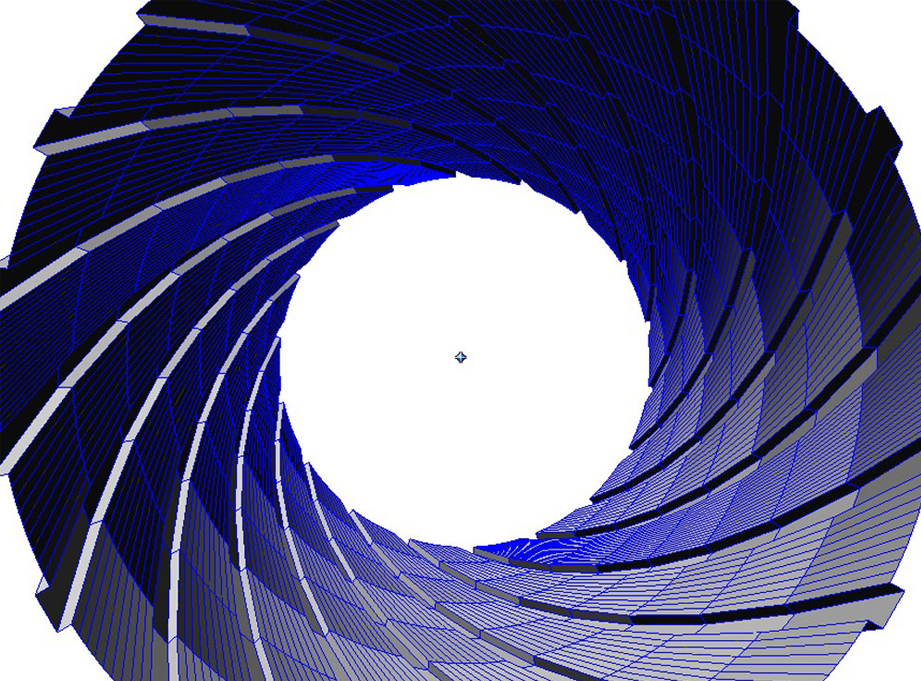
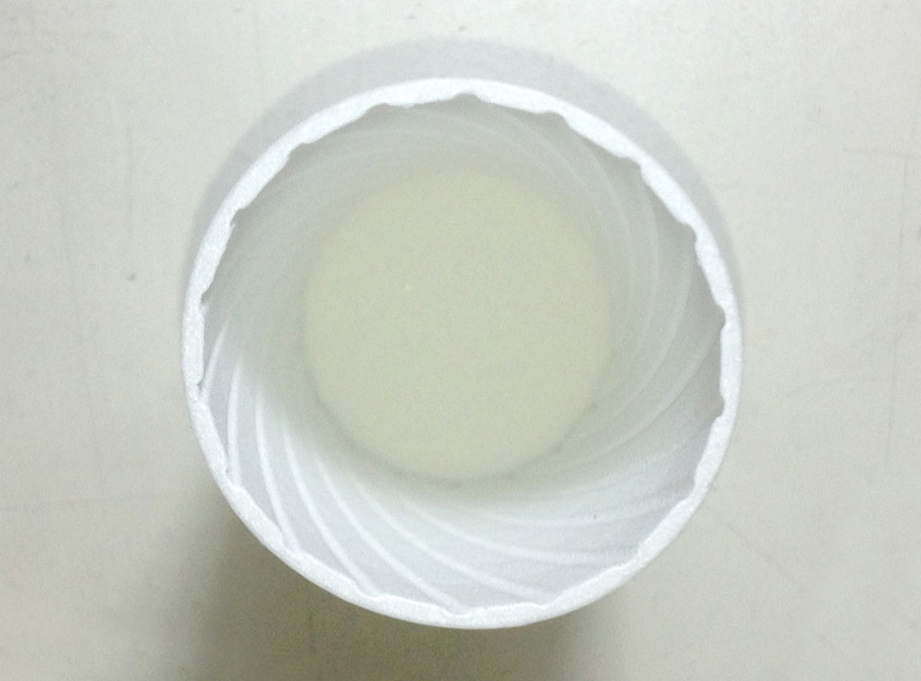
I experimented with using a PVC pipe for the barrel but with such a large bore, the pistol was looking like a flare gun. To remedy this, I modeled a rifled barrel in 3D.
A few weeks later, Shapeways sent me a beautiful barrel insert. I modeled it about 3-1/4″ deep so that it would have the illusion of being longer.
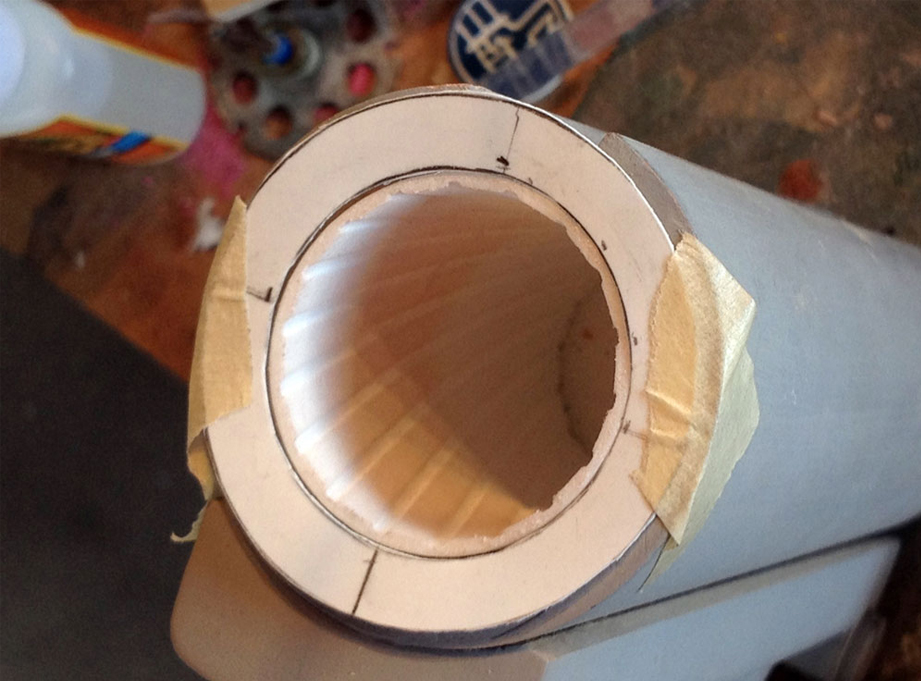
I drew out a template that would allow me to glue in the insert centered in the acrylic tube.
I had the BPRD seal for the grips laser engraved out of plastic. I molded one and cast duplicates in resin. I heated them so that they could be curved like the grips.
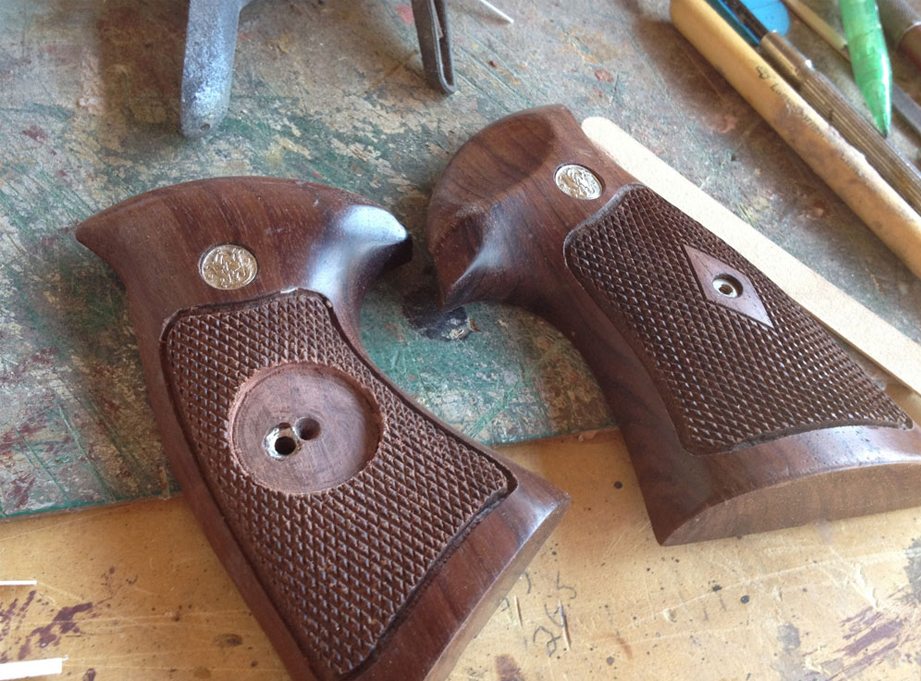
Now that the grips had been modified for the prop, I molded them to make resin copies.
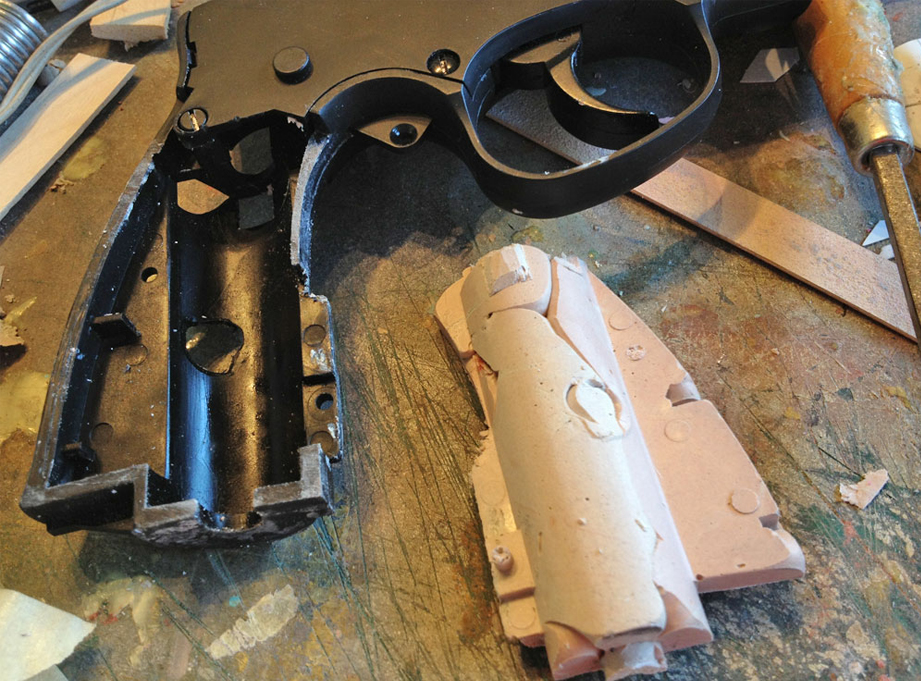
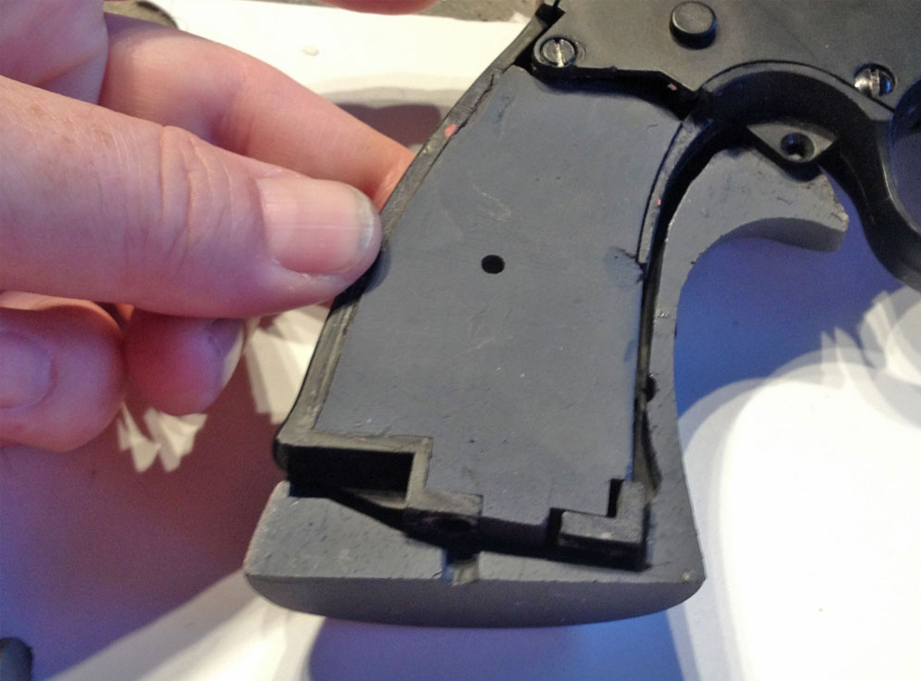
For the kit, I needed to make an insert to strengthen the frame of the airsoft gun. I sprayed the frame with mold release and then glopped a ton of Bondo into the space. Once it cured, I was able to pop out a perfect insert.
The cast plastic frame insert.
used a Dremel cutting disk to remove the bottom of the airsoft barrel so that it could fit into the new barrel frame.
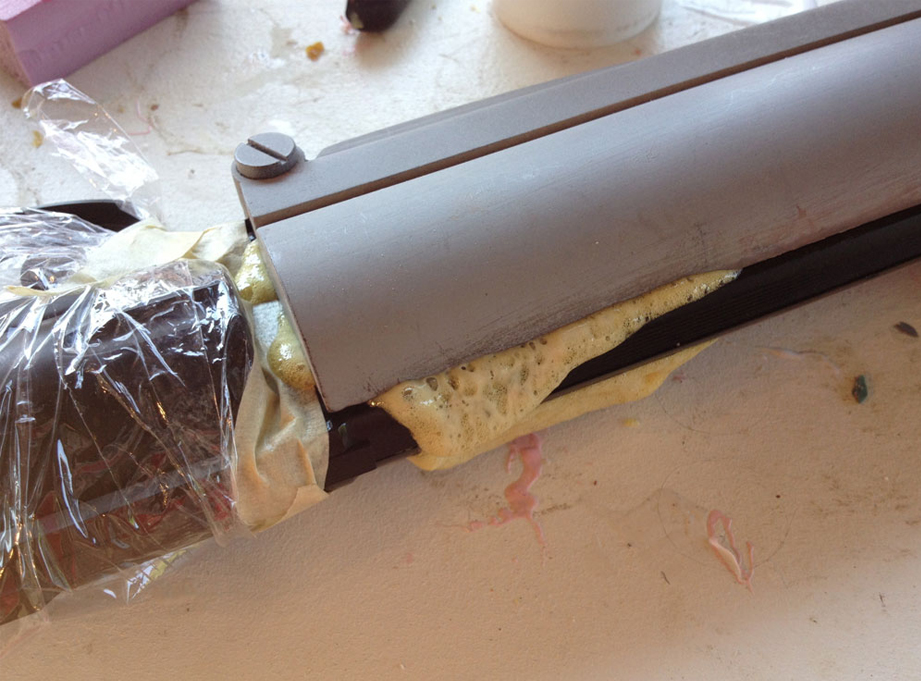
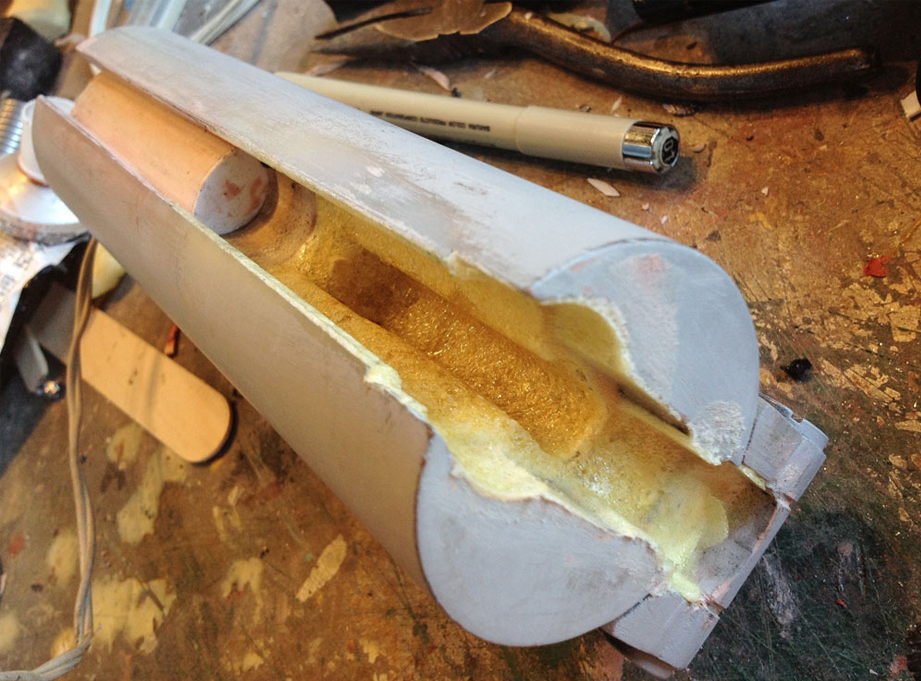
In order to mold the new barrel assembly, I needed to fill the cavity so that the master (and any copy) could be removed from the mold.
I covered the gun in plastic wrap, poured some expanding foam into the cavity and then seated the gun. The foam expanded and filled the inner space.
As the expanding foam is the same as the epoxy resin, there was a real chance of glueing the gun into the barrel assembly. Fortunately, I was able to remove the gun.
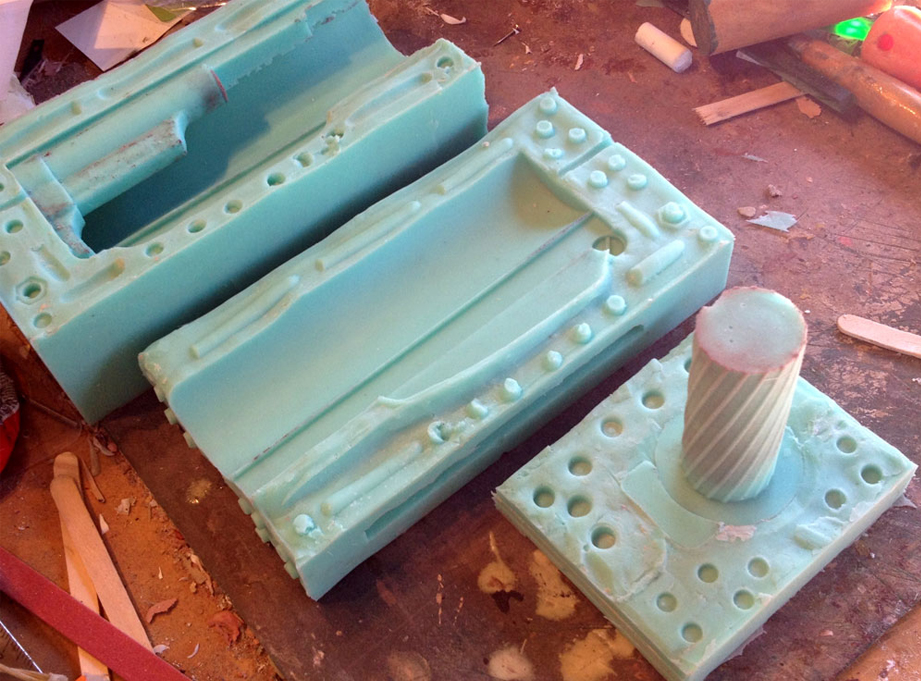
To make a mold of this piece, I had two choices. One involved cutting the piece down the middle for two 2-part molds or keeping the master in one piece and making a 3-part mold (two sides and an end plug for the barrel). I wanted to keep the rifling whole so I chose to do the 3-part mold. I sealed off the end and poured each side.
After the sides cured, I poured the end. This was a tough shape to mold and I ended up breaking the master just de-molding it. I also had air bubbles in recesses that would not have been a problem if I had cut the master in half. But, in the end, I have a working mold…no use crying over spilled milk.
The first cast from the molds. Good outer finish with only minor cleanup in the inside.
It’s a tighter fit than I expected due to minor resin shrinking but a little work with the Dremel fixes that.
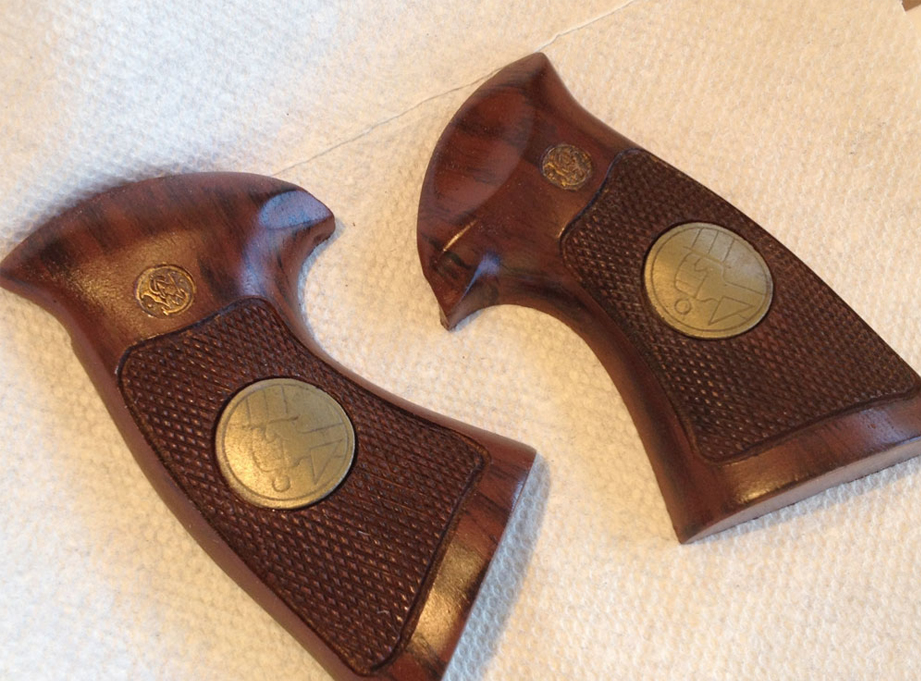
I mixed brass powder into my resin to cold cast the B.P.R.D. seals for the grip. They were shined up by buffing with 000 steel wool.
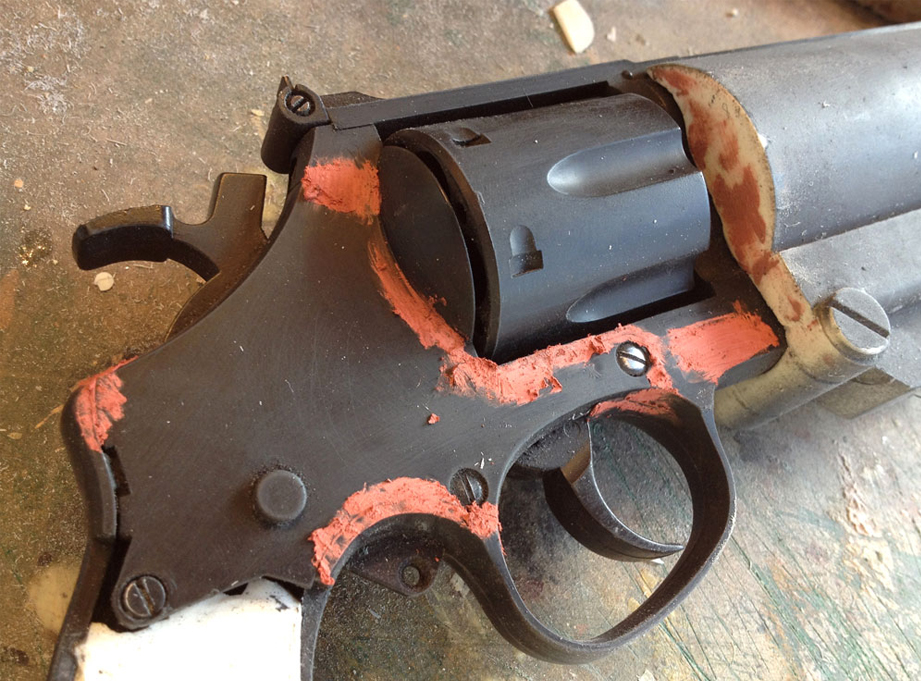
The last thing that I had to do to the donor airsoft gun was remove the seams from the frame. I used spot filler putty on those as well as the manufacturer’s engraving.
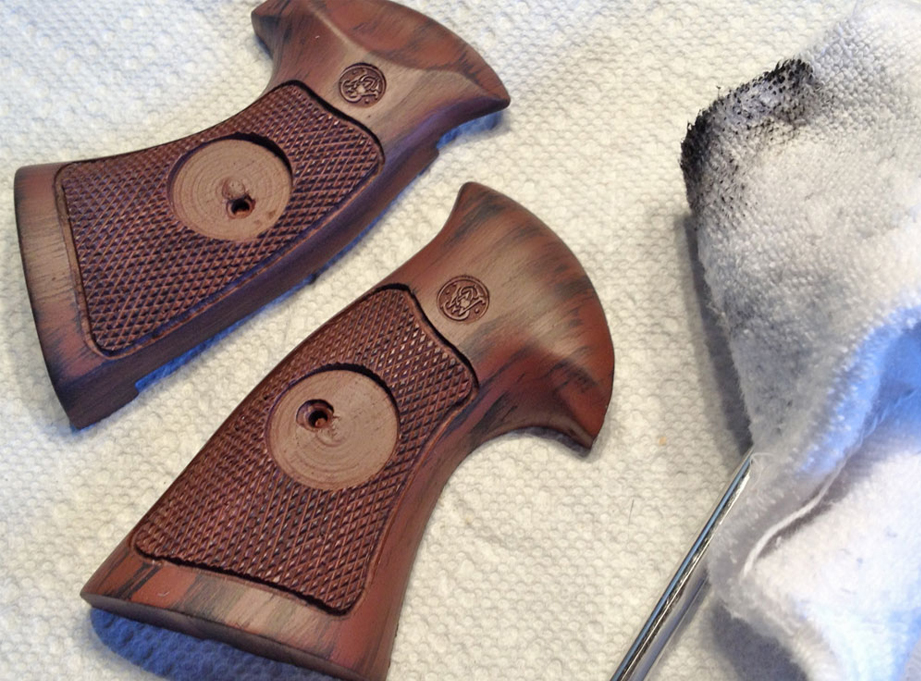
The client was getting his original wood grips so I had to paint my resin copies. I started with a base coat of dark brown.
I used an old sock to brush on wood grain with black acrylic paint.
I painted the Smith & Wesson logos gold and sprayed a protective top coat of gloss Crystal Clear to finish them.
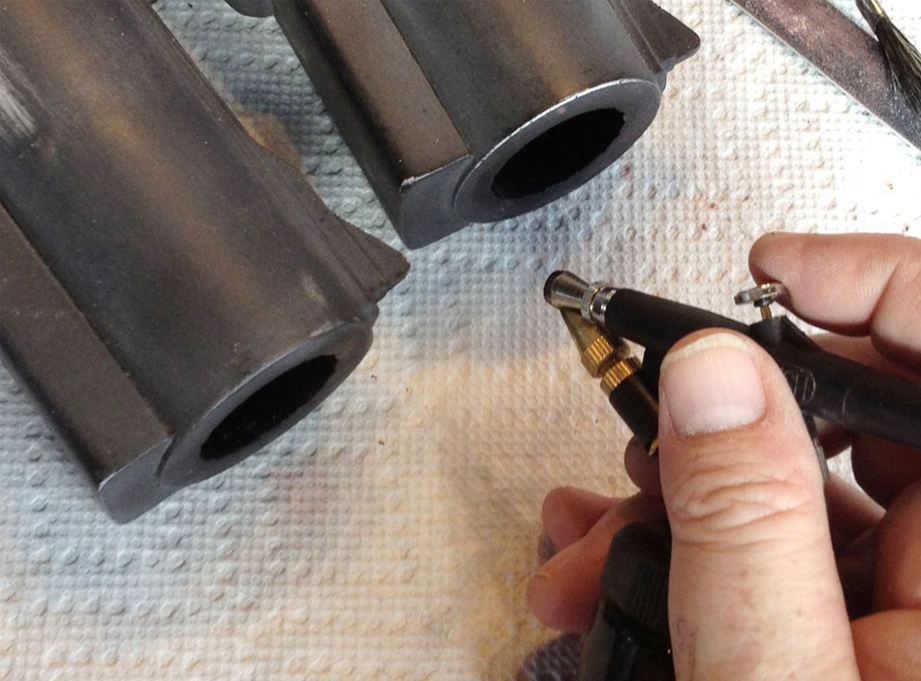
I airbrushed the inside of the barrels with a gloss black model paint. An airbrush is able to get into tight spaces that a can of spray paint can’t.
All the metal parts were painted with Testors Metallizer Gun Metal. After it dried, I buffed the paint to a sheen. The gun was finished by dry brushing silver to bring out detail and add simulated wear.
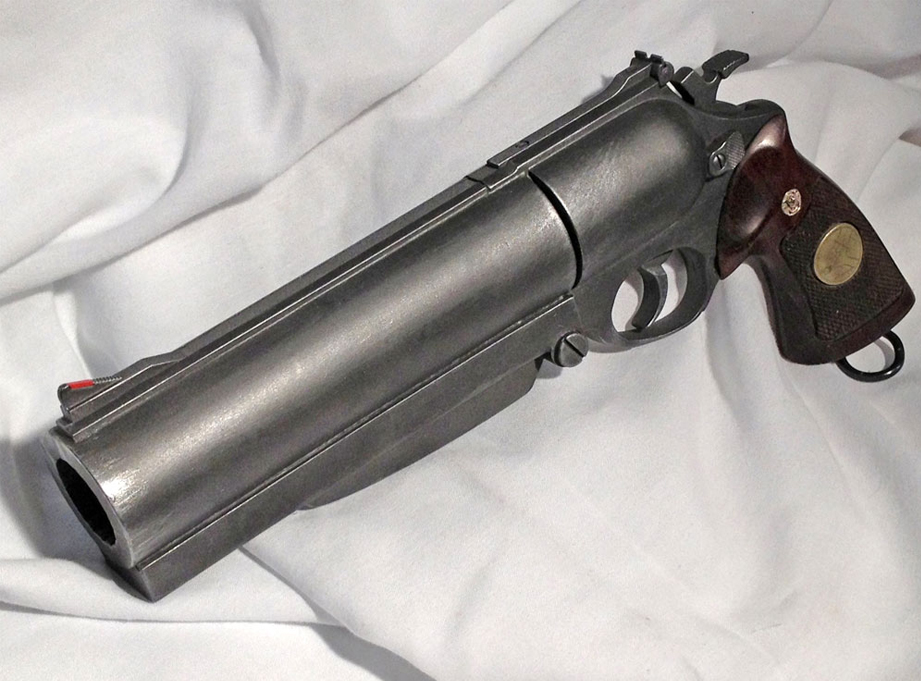
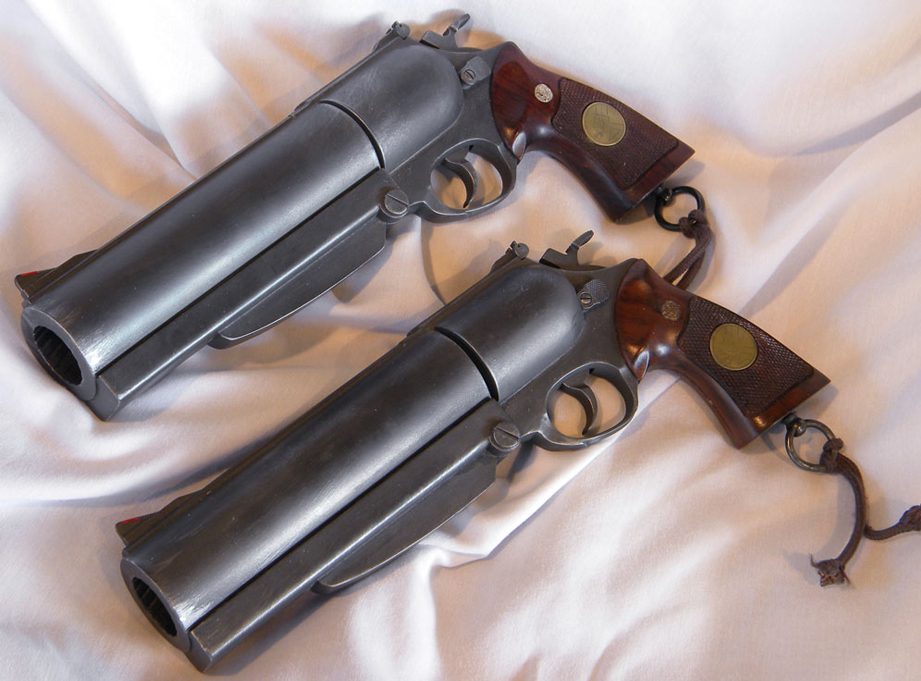
The final gun. The heavy resin barrel gives this replica a convincing heft!
The client’s gun is on top, mine is below it…the difference being the painted resin grips. I’m happy to have one more item in my Hellboy collection!
Grip detail.
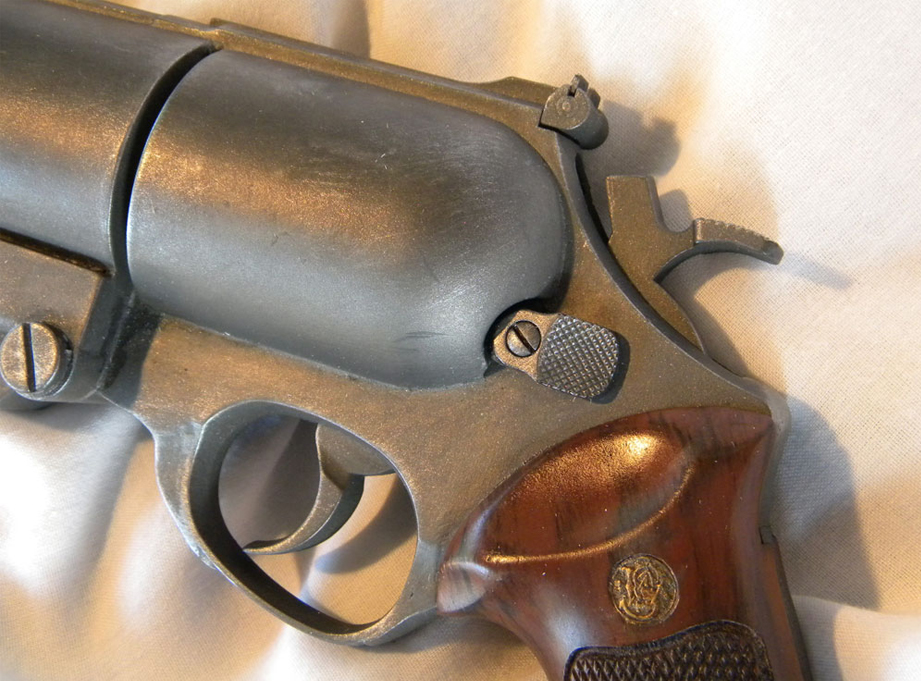
Frame detail.
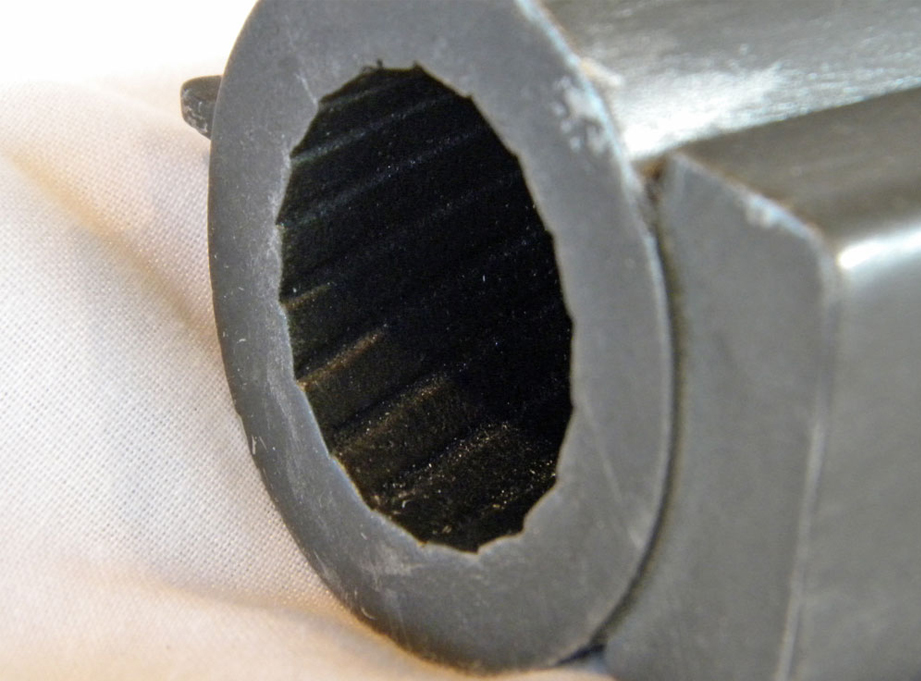
Muzzle detail.
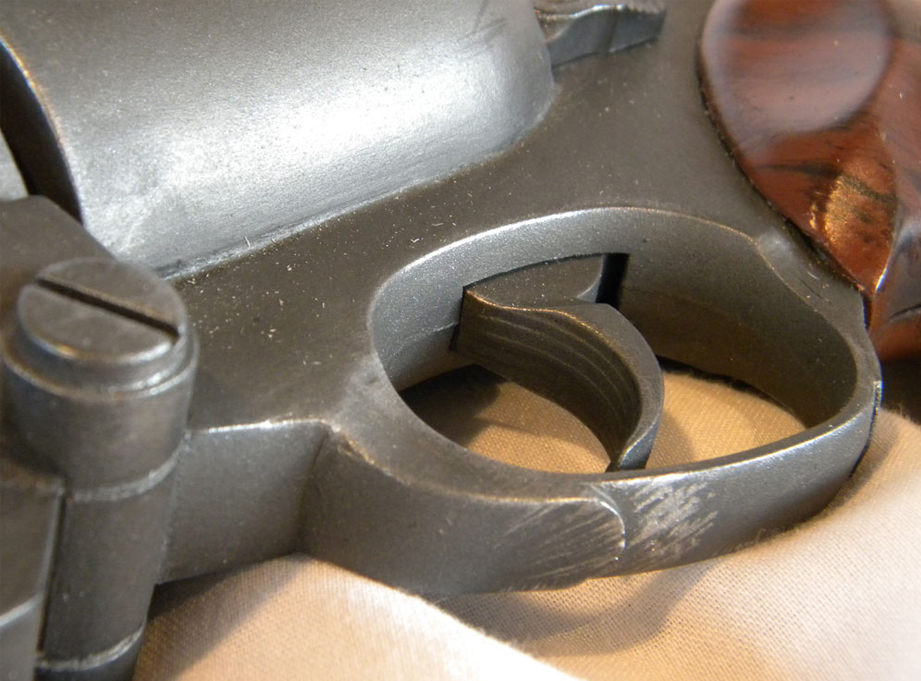
Trigger detail.
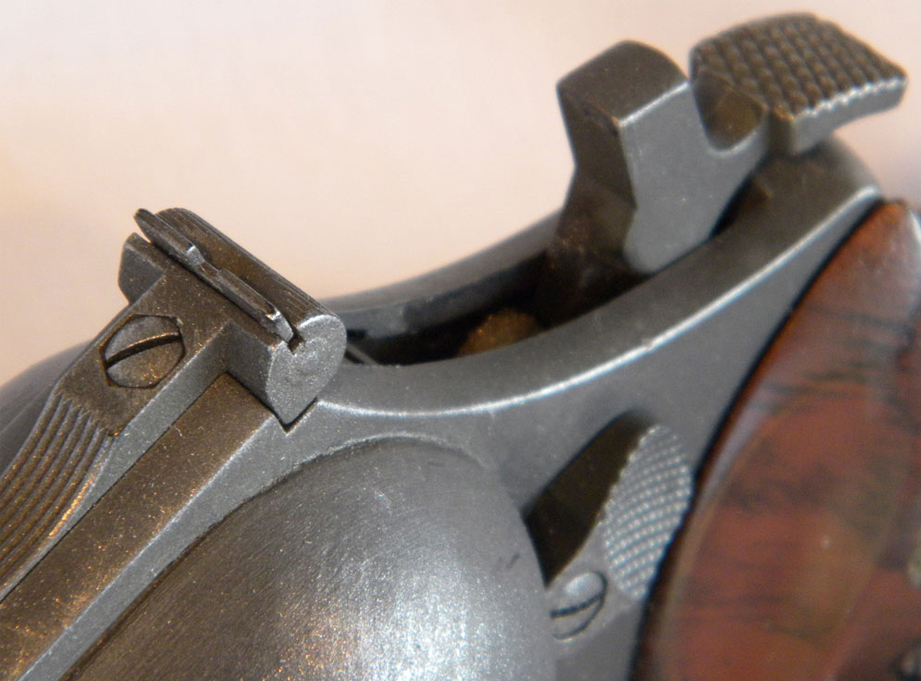
Hammer detail.
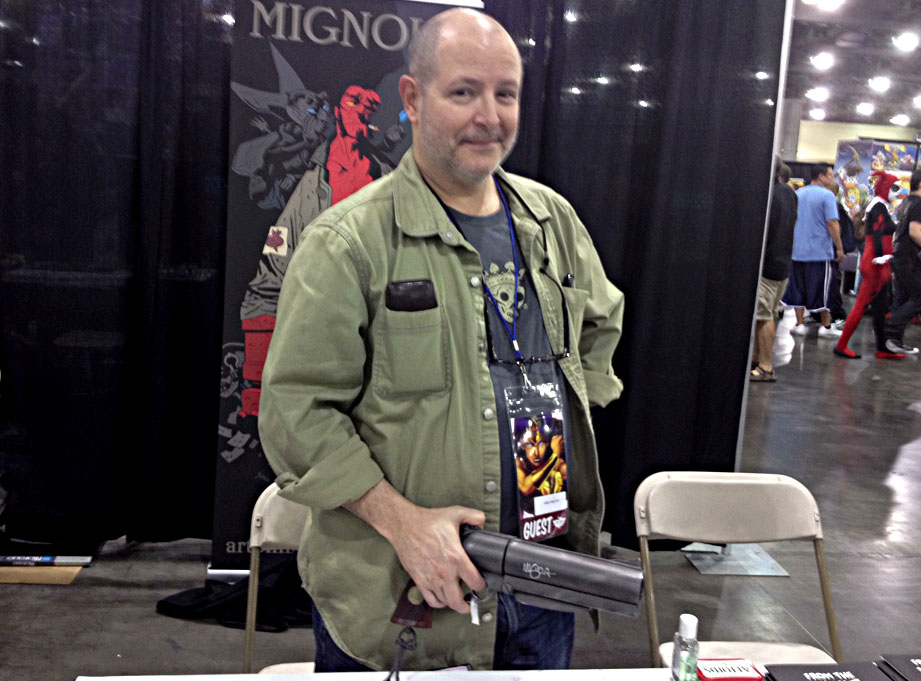
I was able to get my replica signed by Hellboy creator Mike Mignola himself at a local convention. He was nice enough to say that it was the best replica of the gun that he'd ever seen.